
Lightroom Basics #4 The Color Mixer Panel
Lightroom’s Color Mixer is one of the most useful tools for refining color without affecting an entire image. The Color Mixer allows photographers to target individual color ranges using Hue, Saturation, and Luminance controls. Hue shifts colors toward neighboring tones, Saturation controls color intensity, and Luminance adjusts brightness. These tools can be used to make small adjustments or, if you like, to completely change the colors in an image.

An extreme example to demonstrate the ability to change colors with the color mixer sliders.
One of the most effective features in the Color Mixer is the Targeted Adjustment Tool, which allows you to click directly on the image and drag to adjust the colors Lightroom detects in that area. This is especially helpful in nature photography where colors often overlap across multiple channels.
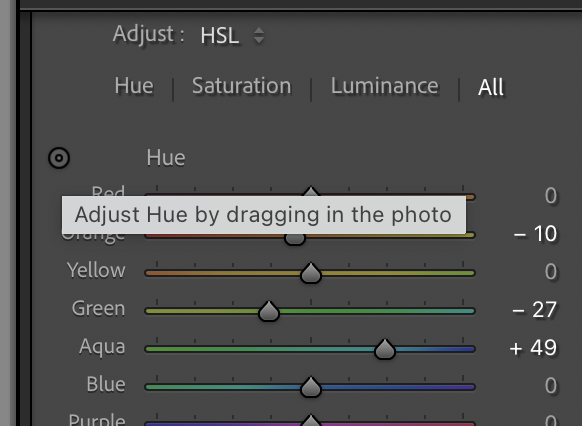
The targeted adjustment tool, represented by the circular target icon in the color mixer pane, allows you to place your cursor over a specific color and drag to make adjustments.
Lightroom also includes the newer Point Color tool, which provides even more precise control. Instead of adjusting broad color ranges like all blues or greens, Point Color allows you to sample a very specific color within the image and independently adjust its hue, saturation, and luminance while controlling the range of tones affected. The Point Color tool is particularly useful when working with subtle color corrections or isolated subjects. For example, you can refine the exact shade of a bird’s feathers, adjust the color of a single flower, or enhance the paint of a classic car without unintentionally changing surrounding colors. The new variance slider is a great choice for smoothing out slight color variations within a given hue. Because the adjustments are highly selective, Point Color often produces cleaner and more natural-looking results than global color edits.
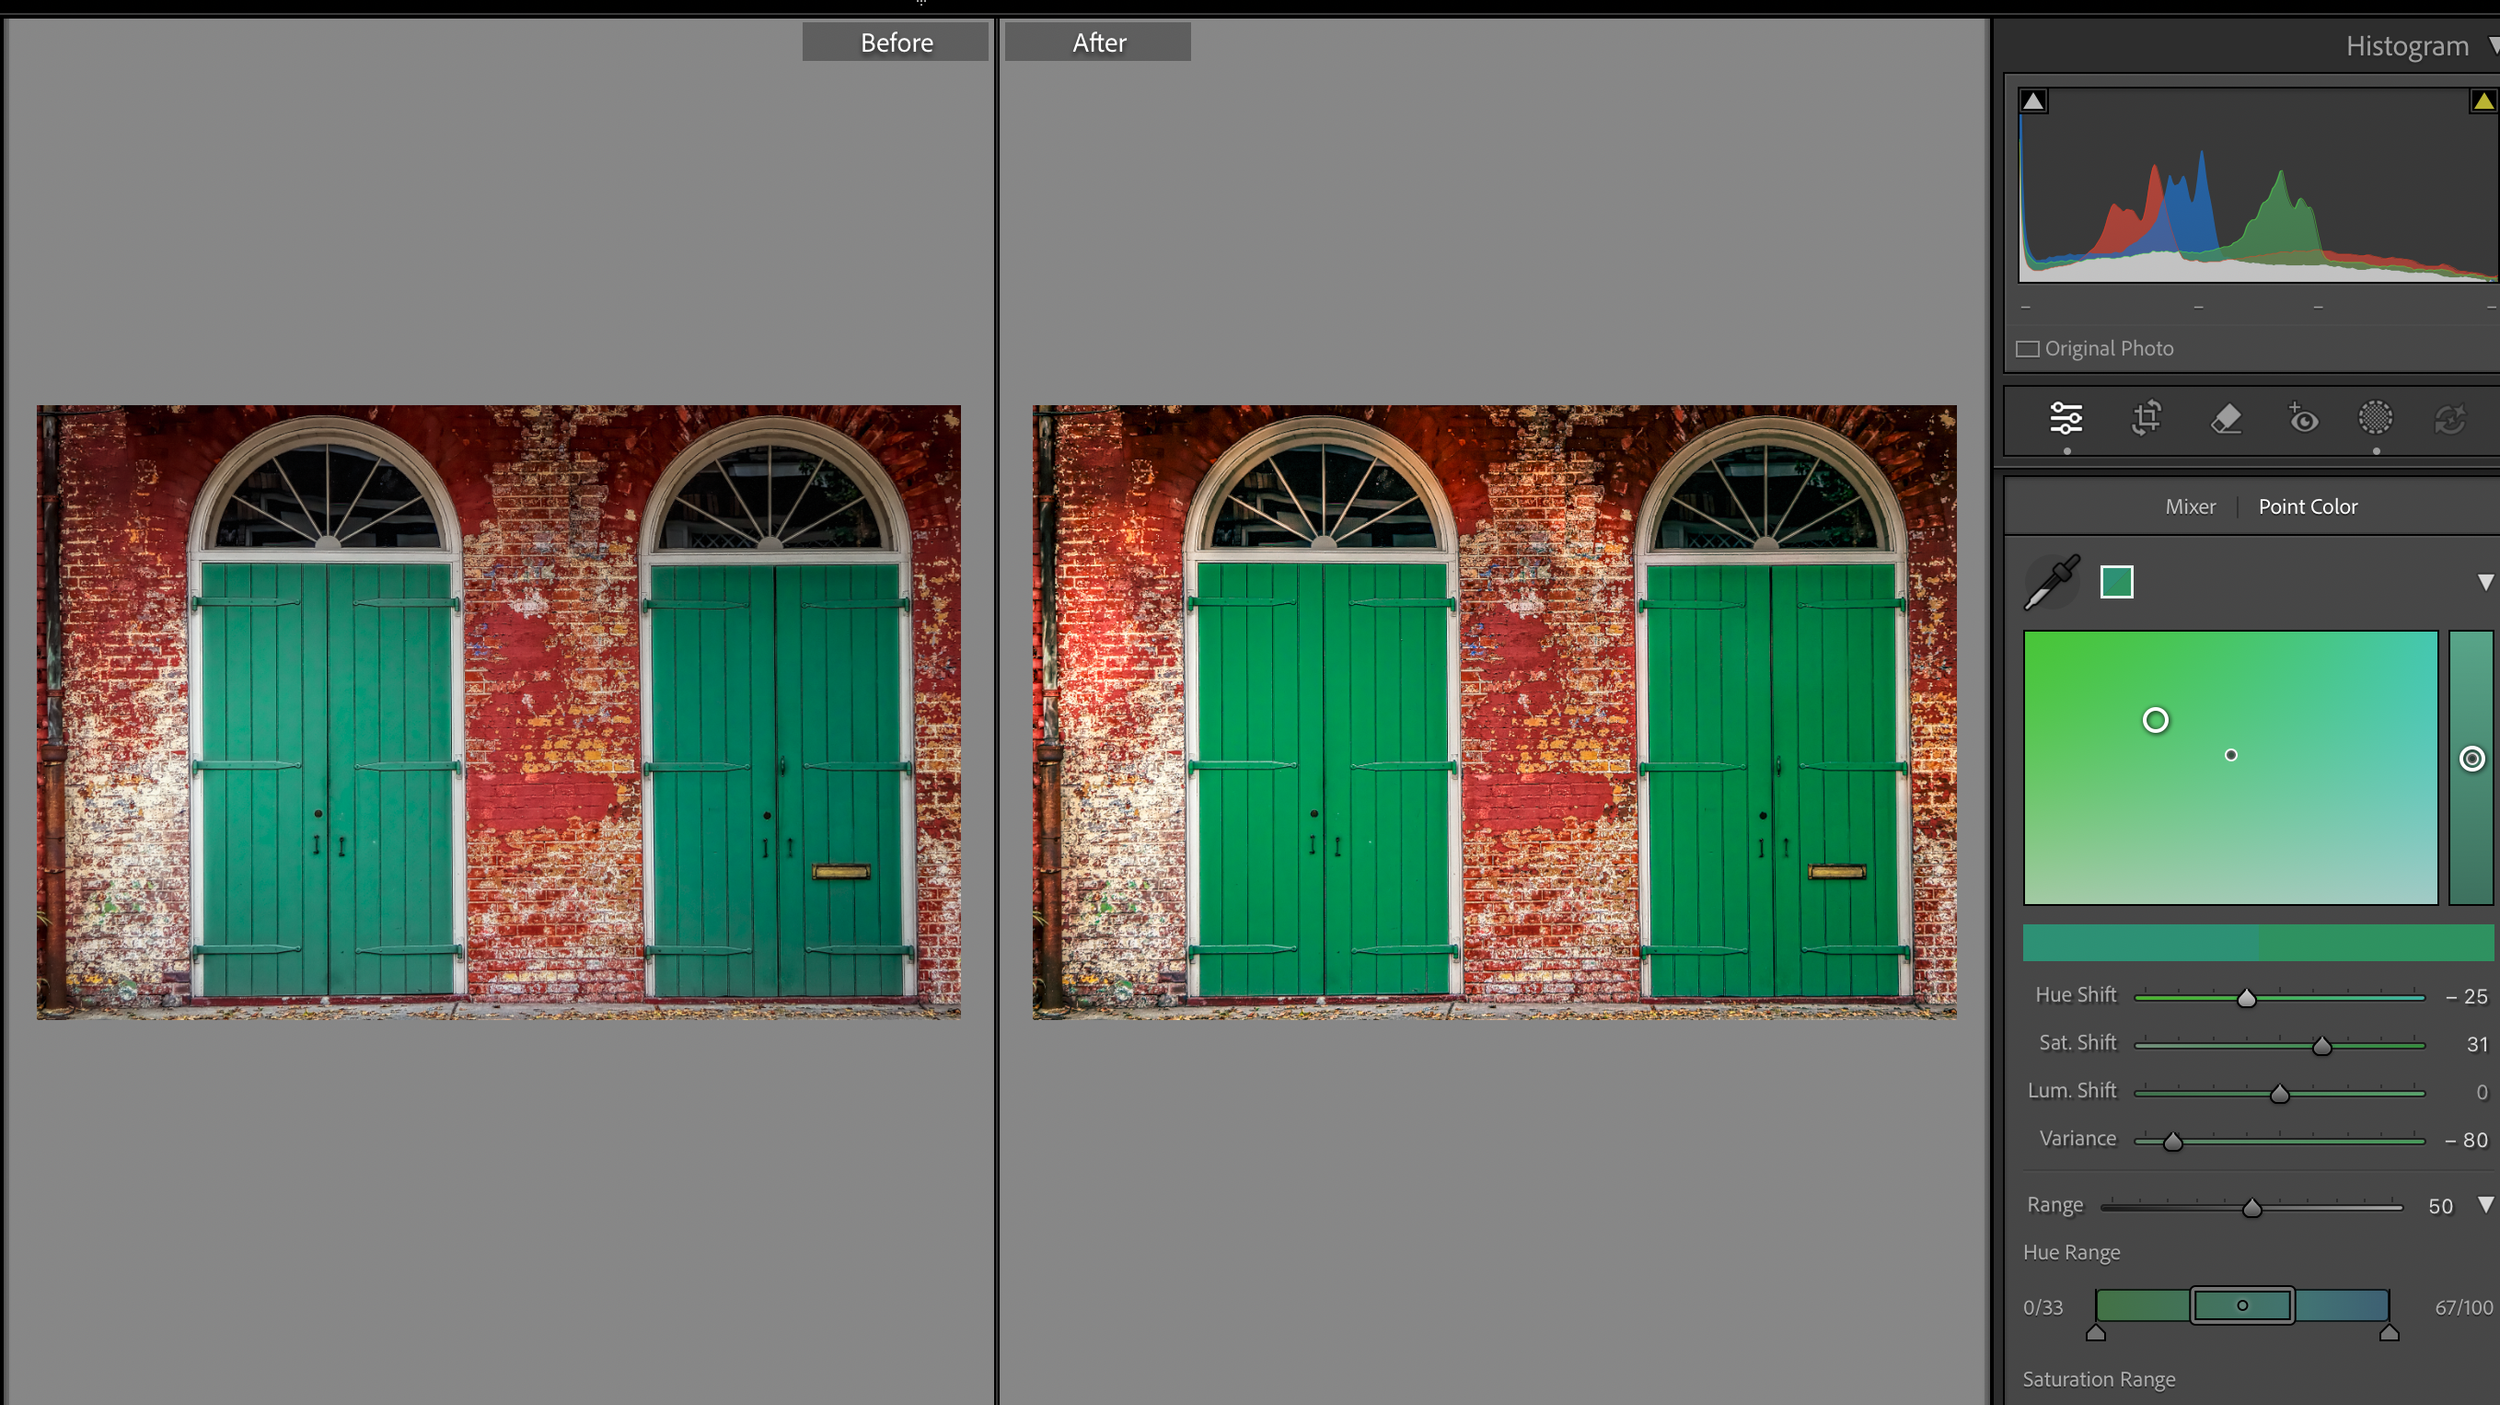
Using the point color tool to change the hue, saturation, and color variance on the green doors.
More from the Lightroom series:
Lightroom Basics #1 - 3 Simple Edits to Improve Your Photos
Lightroom Basics #2 - Exploring the Presence Panel
Lightroom Basics #3 - The Tone Curve