0
Skip to Content
Home
Gallery
Blog
About
Gear
Shop
ESTY Shop
Fine Art America
Adobe Stock Portfolio
Login
Account
Open Menu
Close Menu
Home
Gallery
Blog
About
Gear
Shop
ESTY Shop
Fine Art America
Adobe Stock Portfolio
Login
Account
Open Menu
Close Menu
Home
Gallery
Blog
About
Gear
Folder:
Shop
Back
ESTY Shop
Fine Art America
Adobe Stock Portfolio
Login
Account
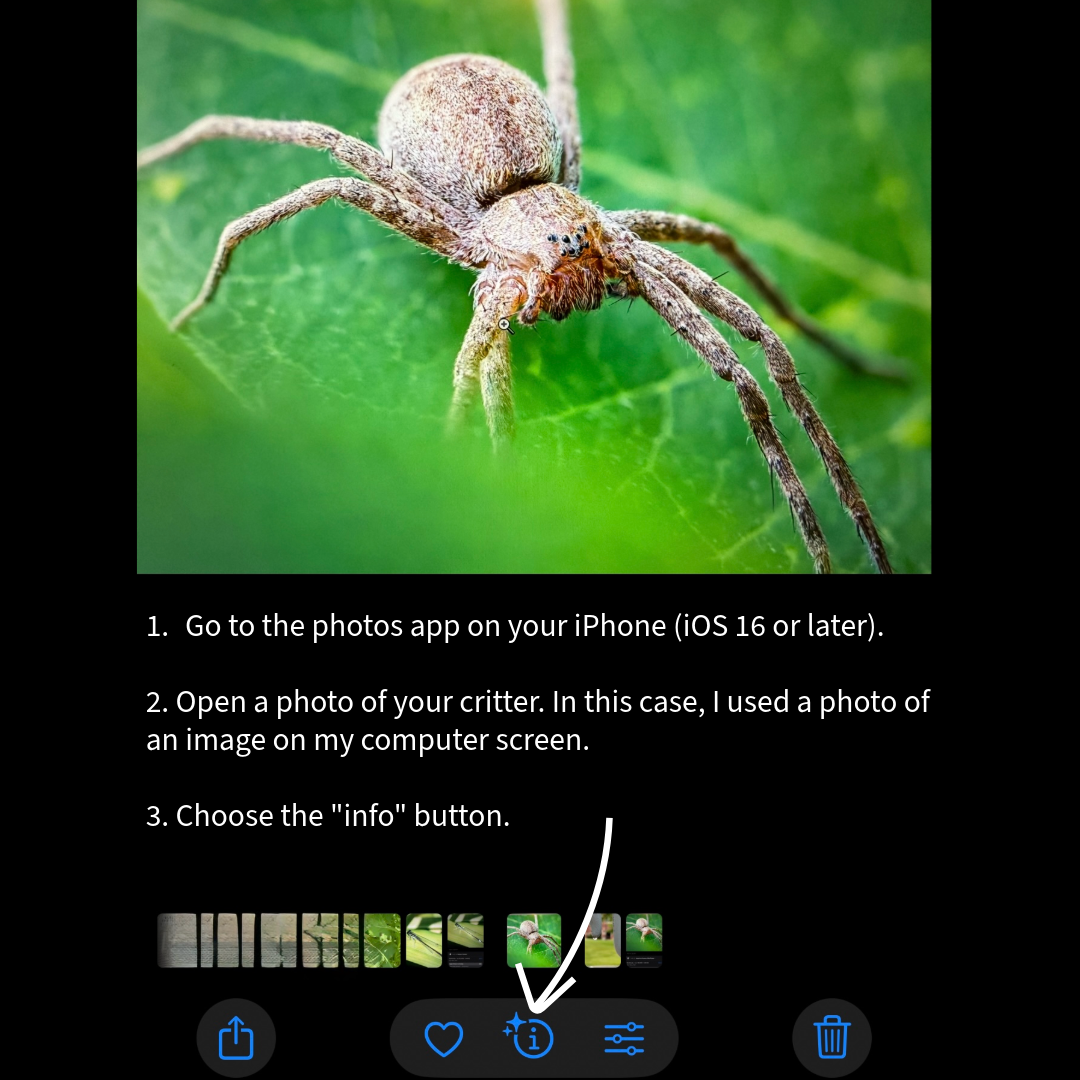
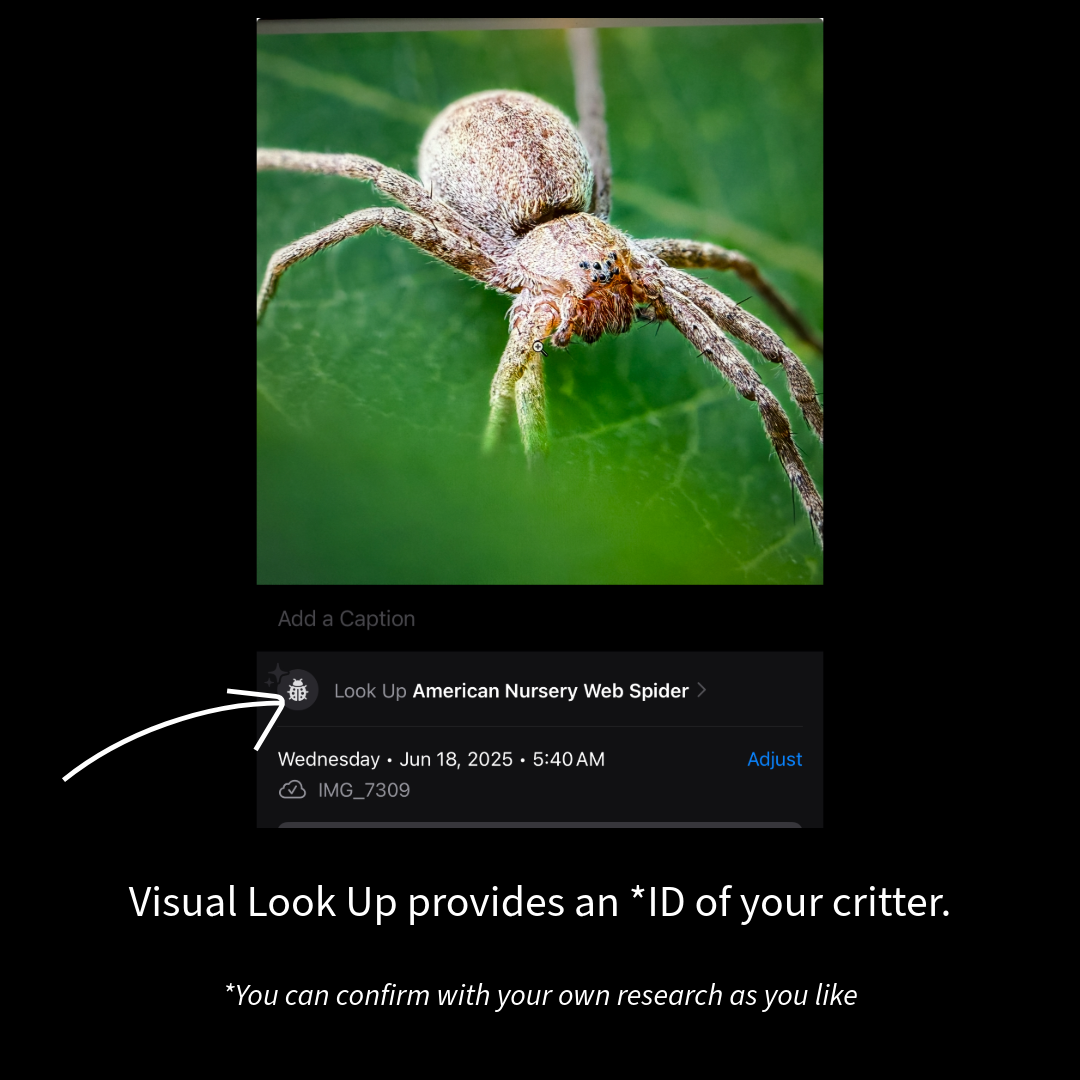
Quick Tip: How to Identify That Critter in Your Photo
May 2
Written By
Jarrod Erbe
Jarrod Erbe
Previous
Previous
Lightroom Basics #4 The Color Mixer Panel
Next
Next
Lightroom Basics #3: The Tone Curve