
Lightroom Basics #1: 3 Simple Edits to Improve Your Photos.
Experimenting with Exposure, Tone, and White Balance
Most photos straight out of the camera are a starting point, not a finished result. This is particularly true when you shoot in RAW format (which allows for maximum editing flexibility). Your camera makes neutral, balanced decisions about light and color, but those choices don’t always reflect the depth, contrast, or mood that drew you to the scene in the first place. That’s where editing becomes part of the creative process.
I tend to approach editing like an experiment - making small, intentional adjustments and observing how each one changes the image. In this Lightroom Basics series, I’ll walk through that process step by step using Adobe Lightroom Classic, starting with three adjustments that have a big impact: exposure, tone, and white balance. In Lightroom Classic, all of these adjustments are found in the Basic panel under WB (white balance) and tone. Even if you use different editing software, many of the concepts in this series will still apply.

A couple notes of caution before we dive in.
First, editing is personal, and is often more of an art than a science. Some images benefit from minimal editing while others allow for bolder choices. The edit represents your vision for the image. The way I see a scene may not jive with the way you see the scene and vice versa.
Second, this series will be introducing tools in groups and, as such, the “final” image presented in each post is only final with respect to that limited group of tools. The actual final image will have the benefit of all of the tools at our disposal..
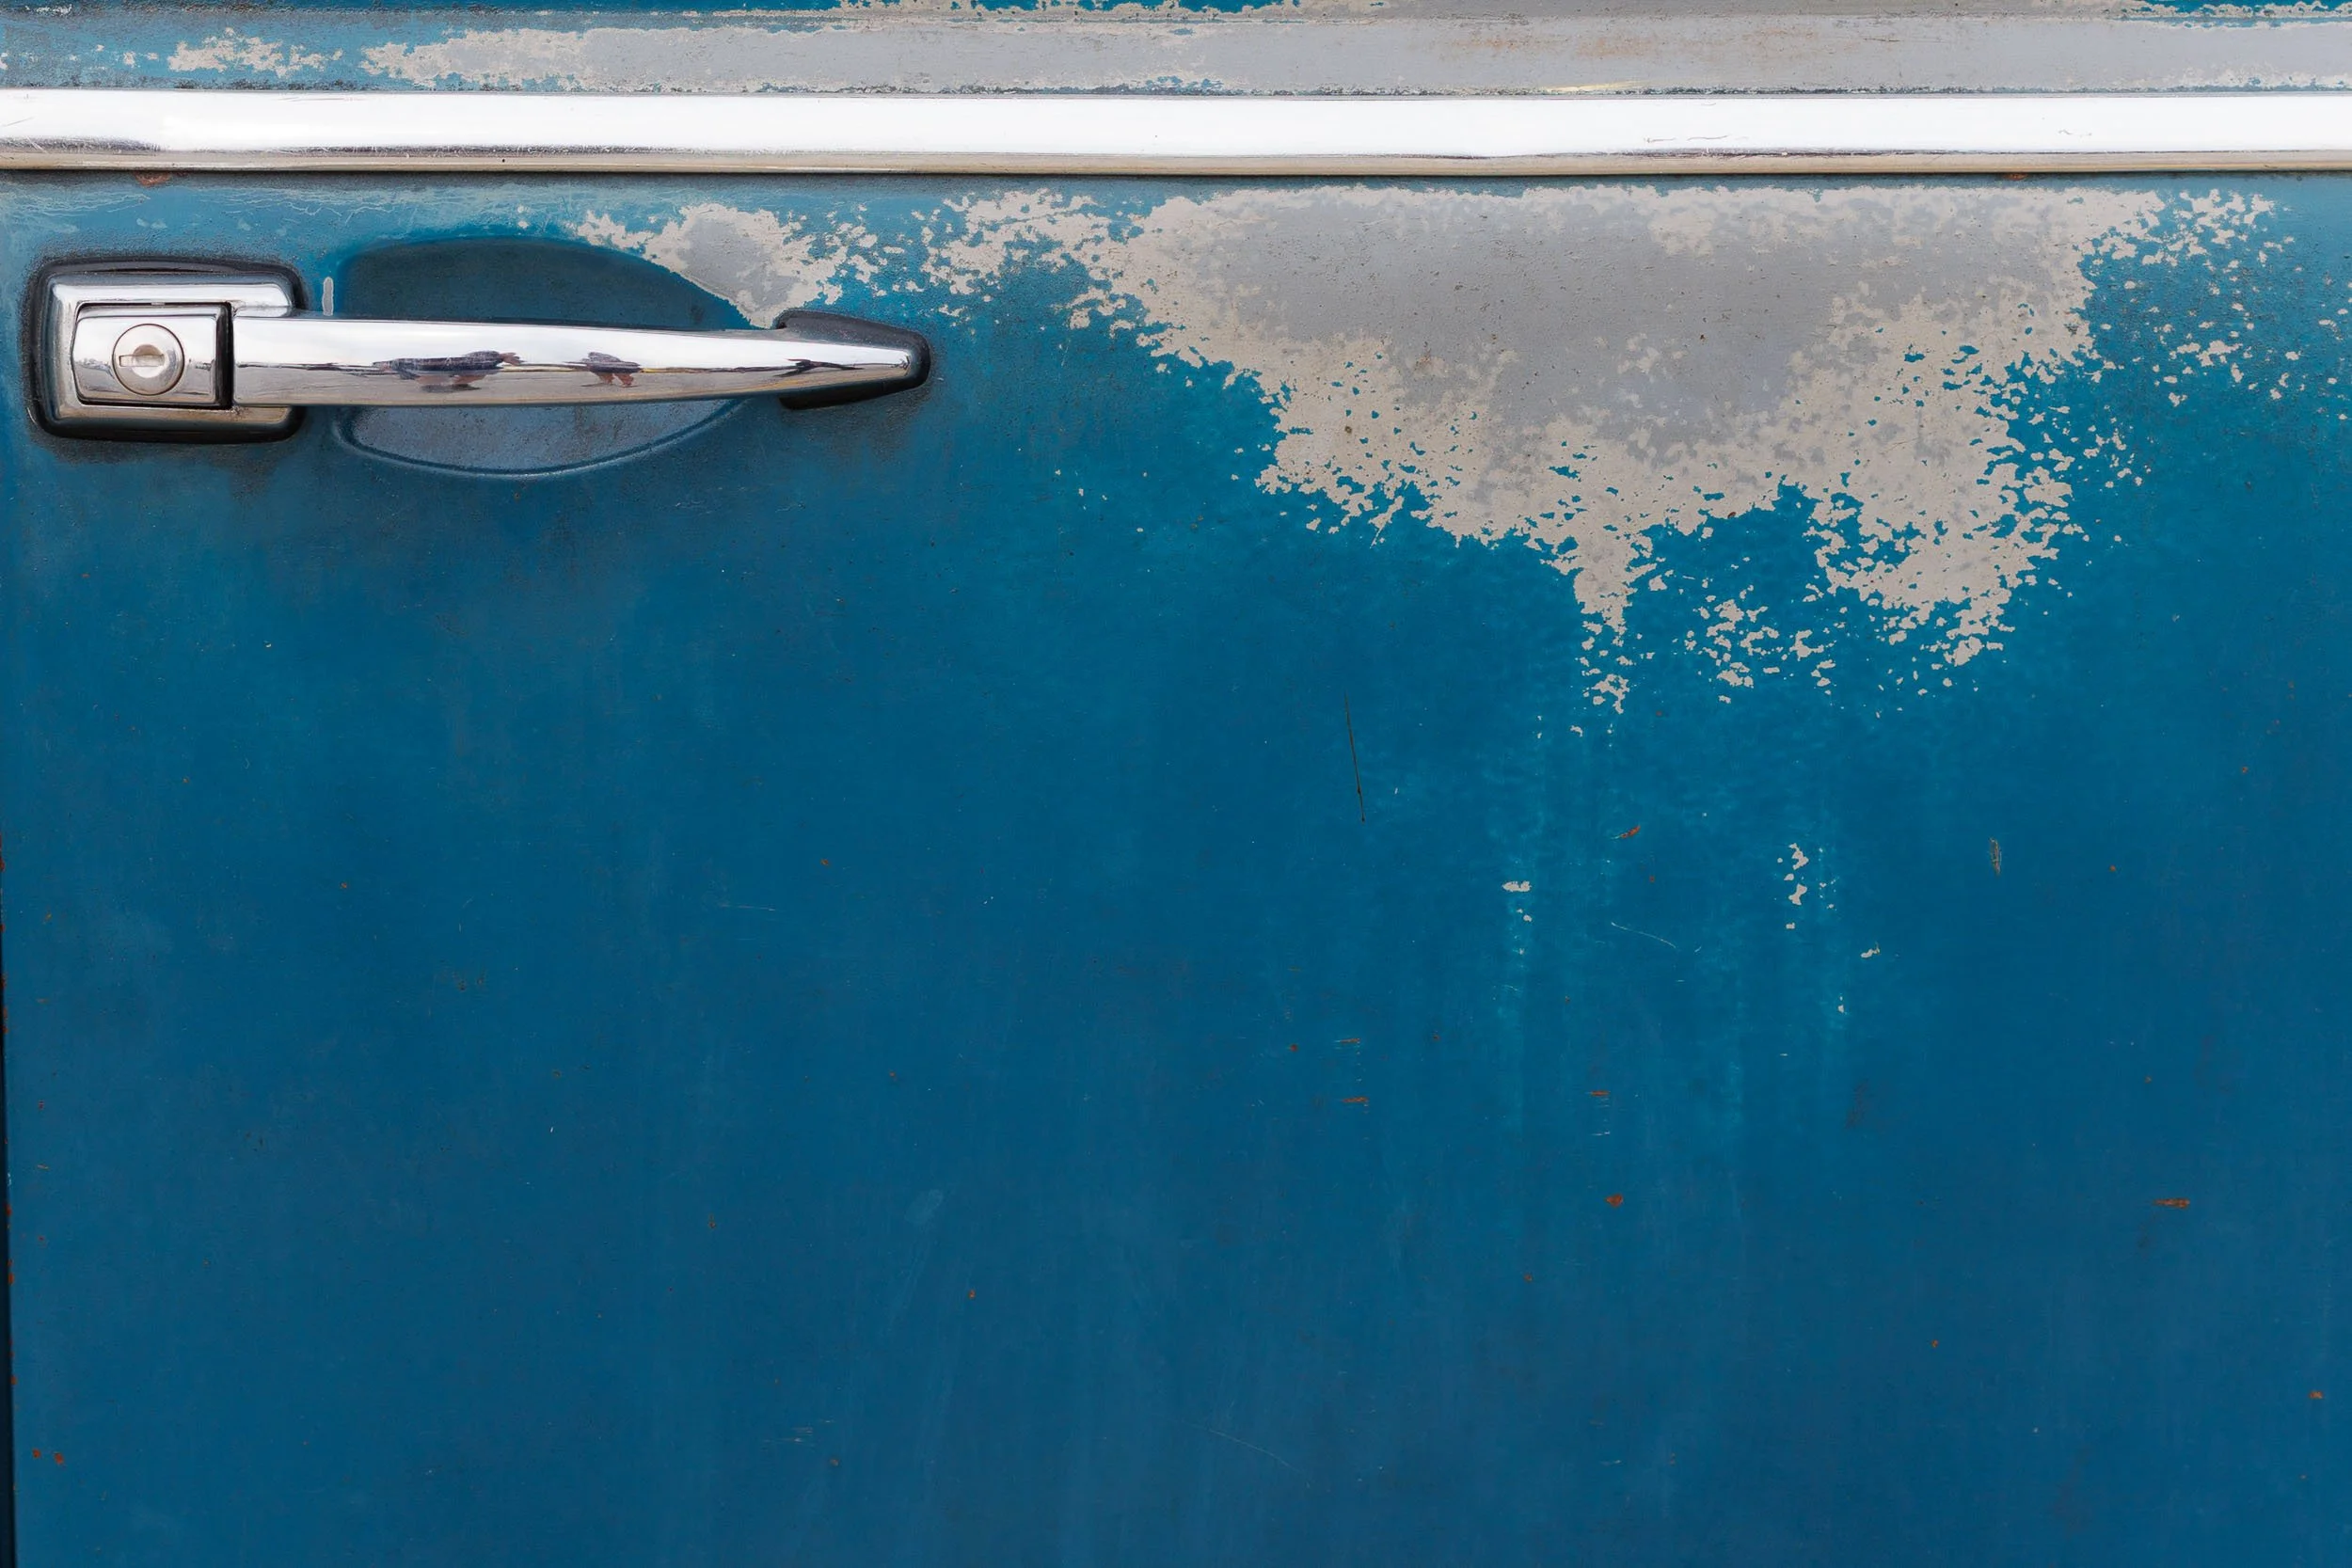
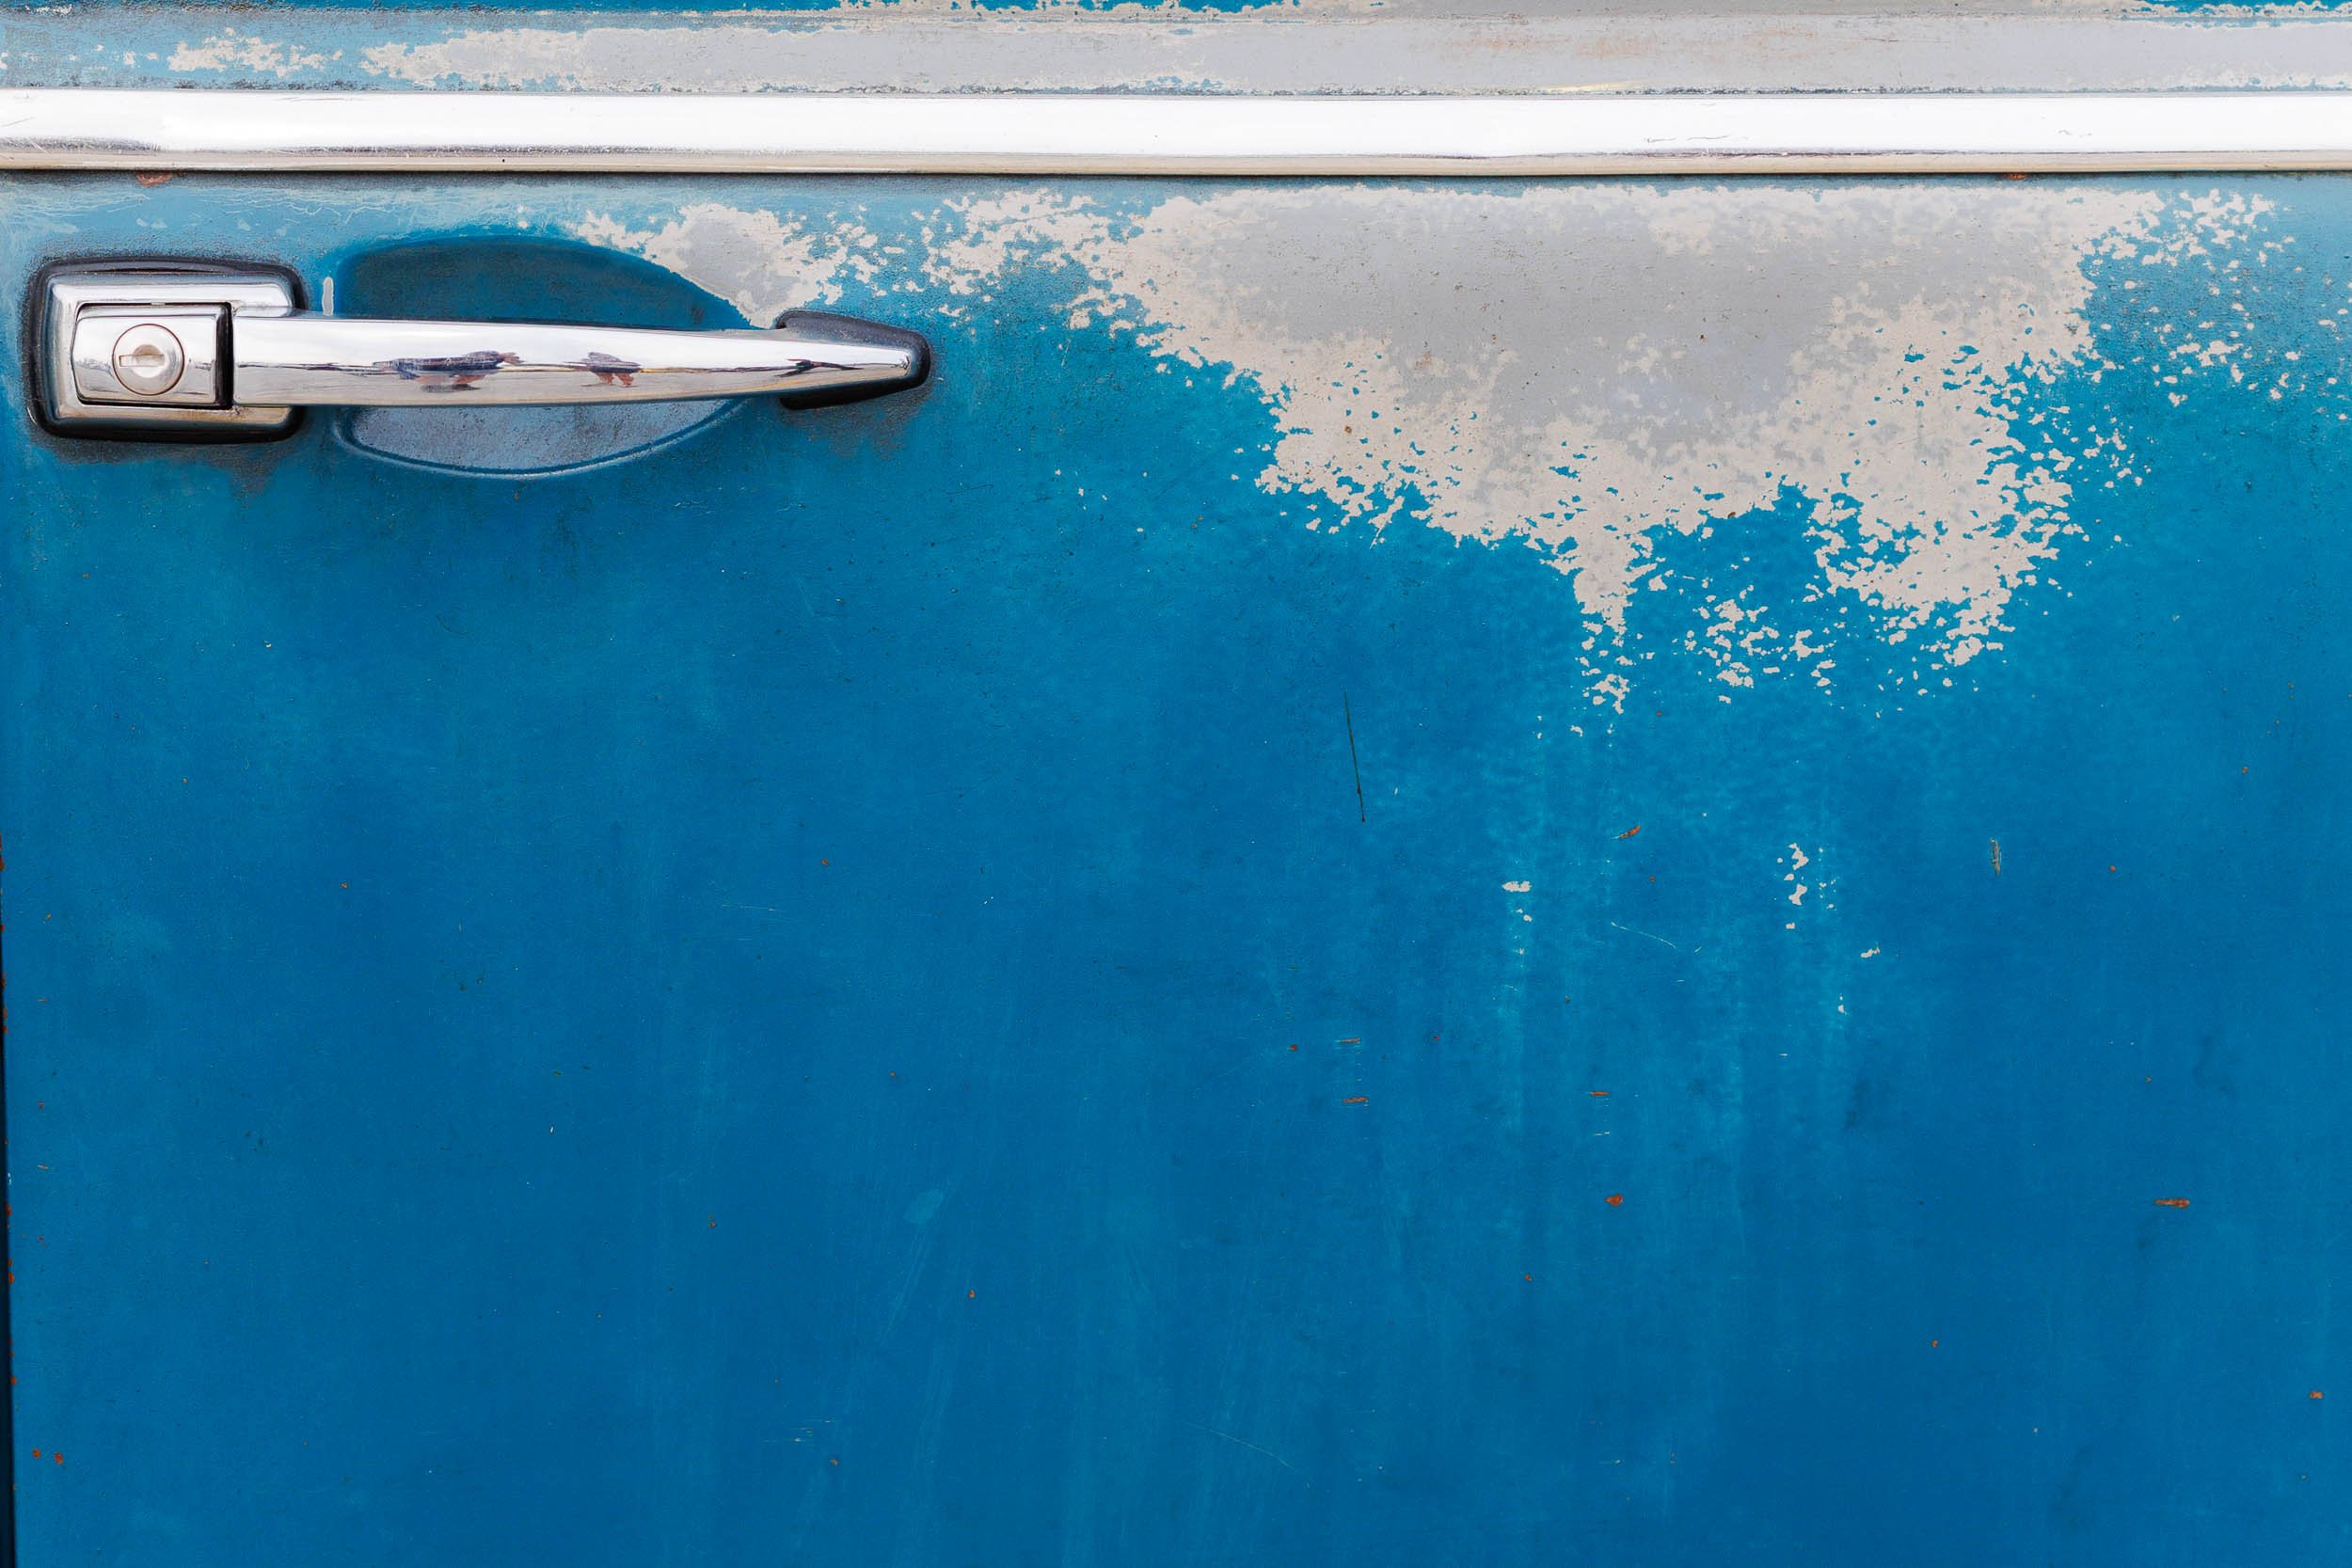
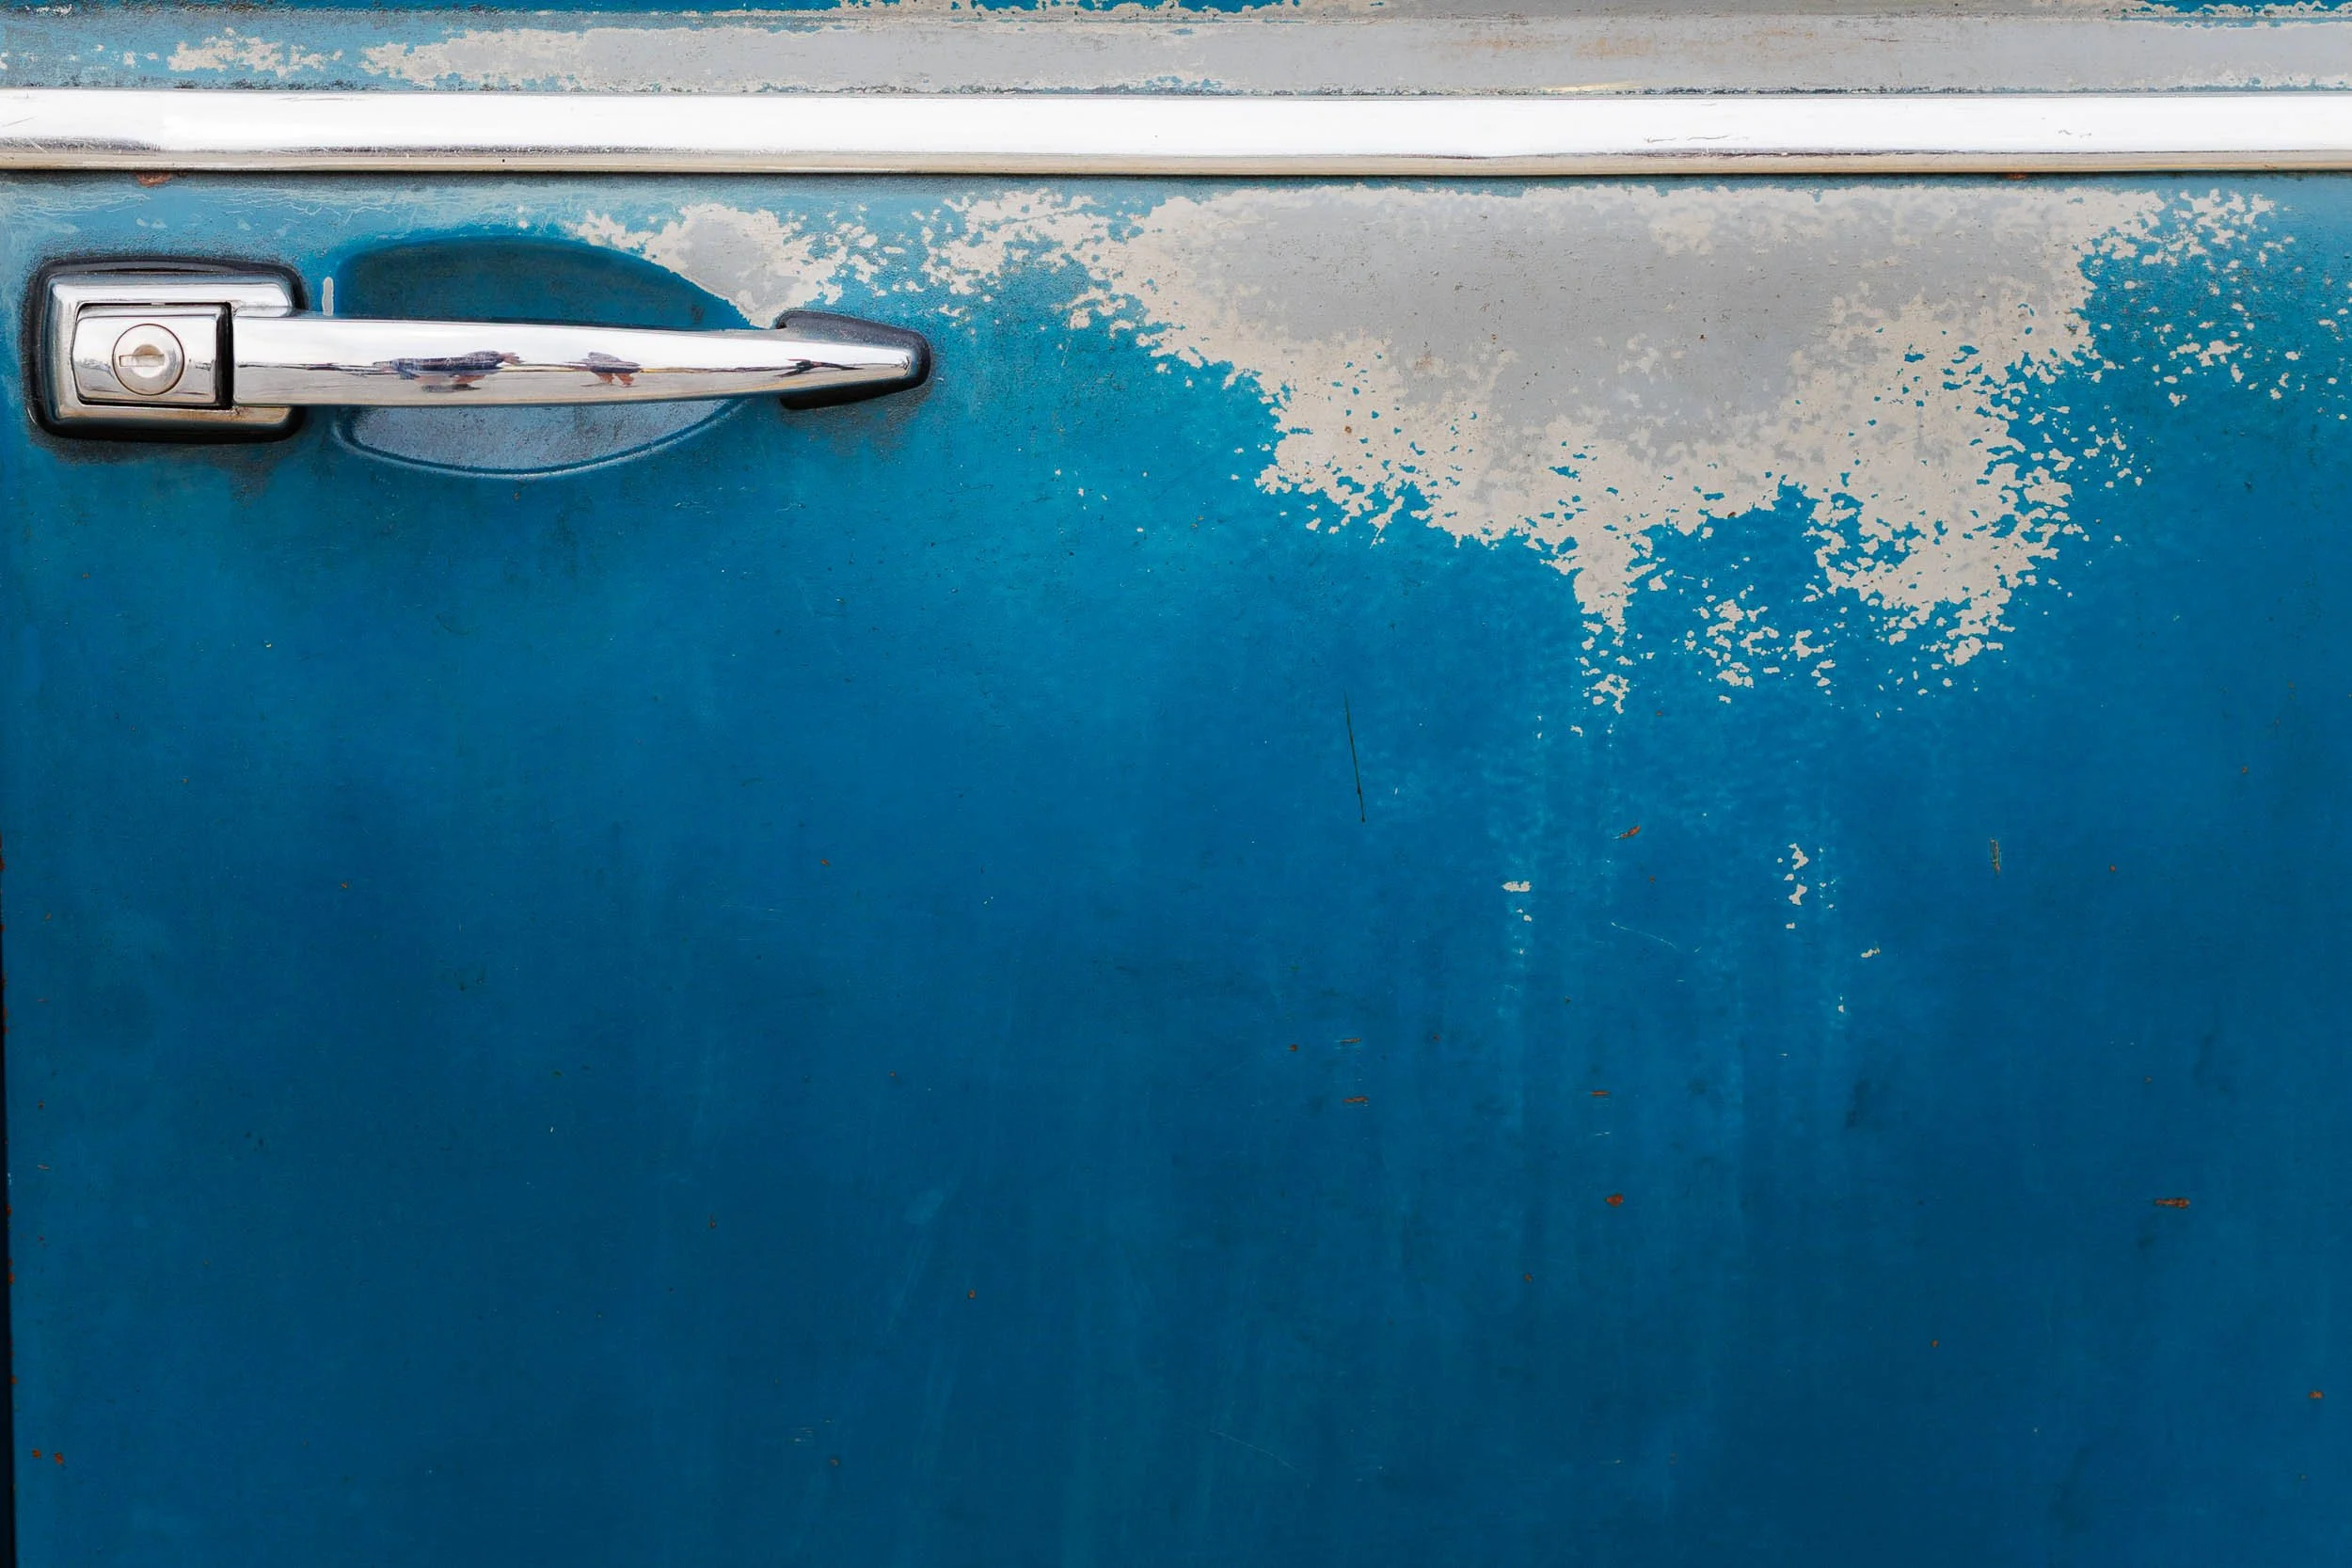
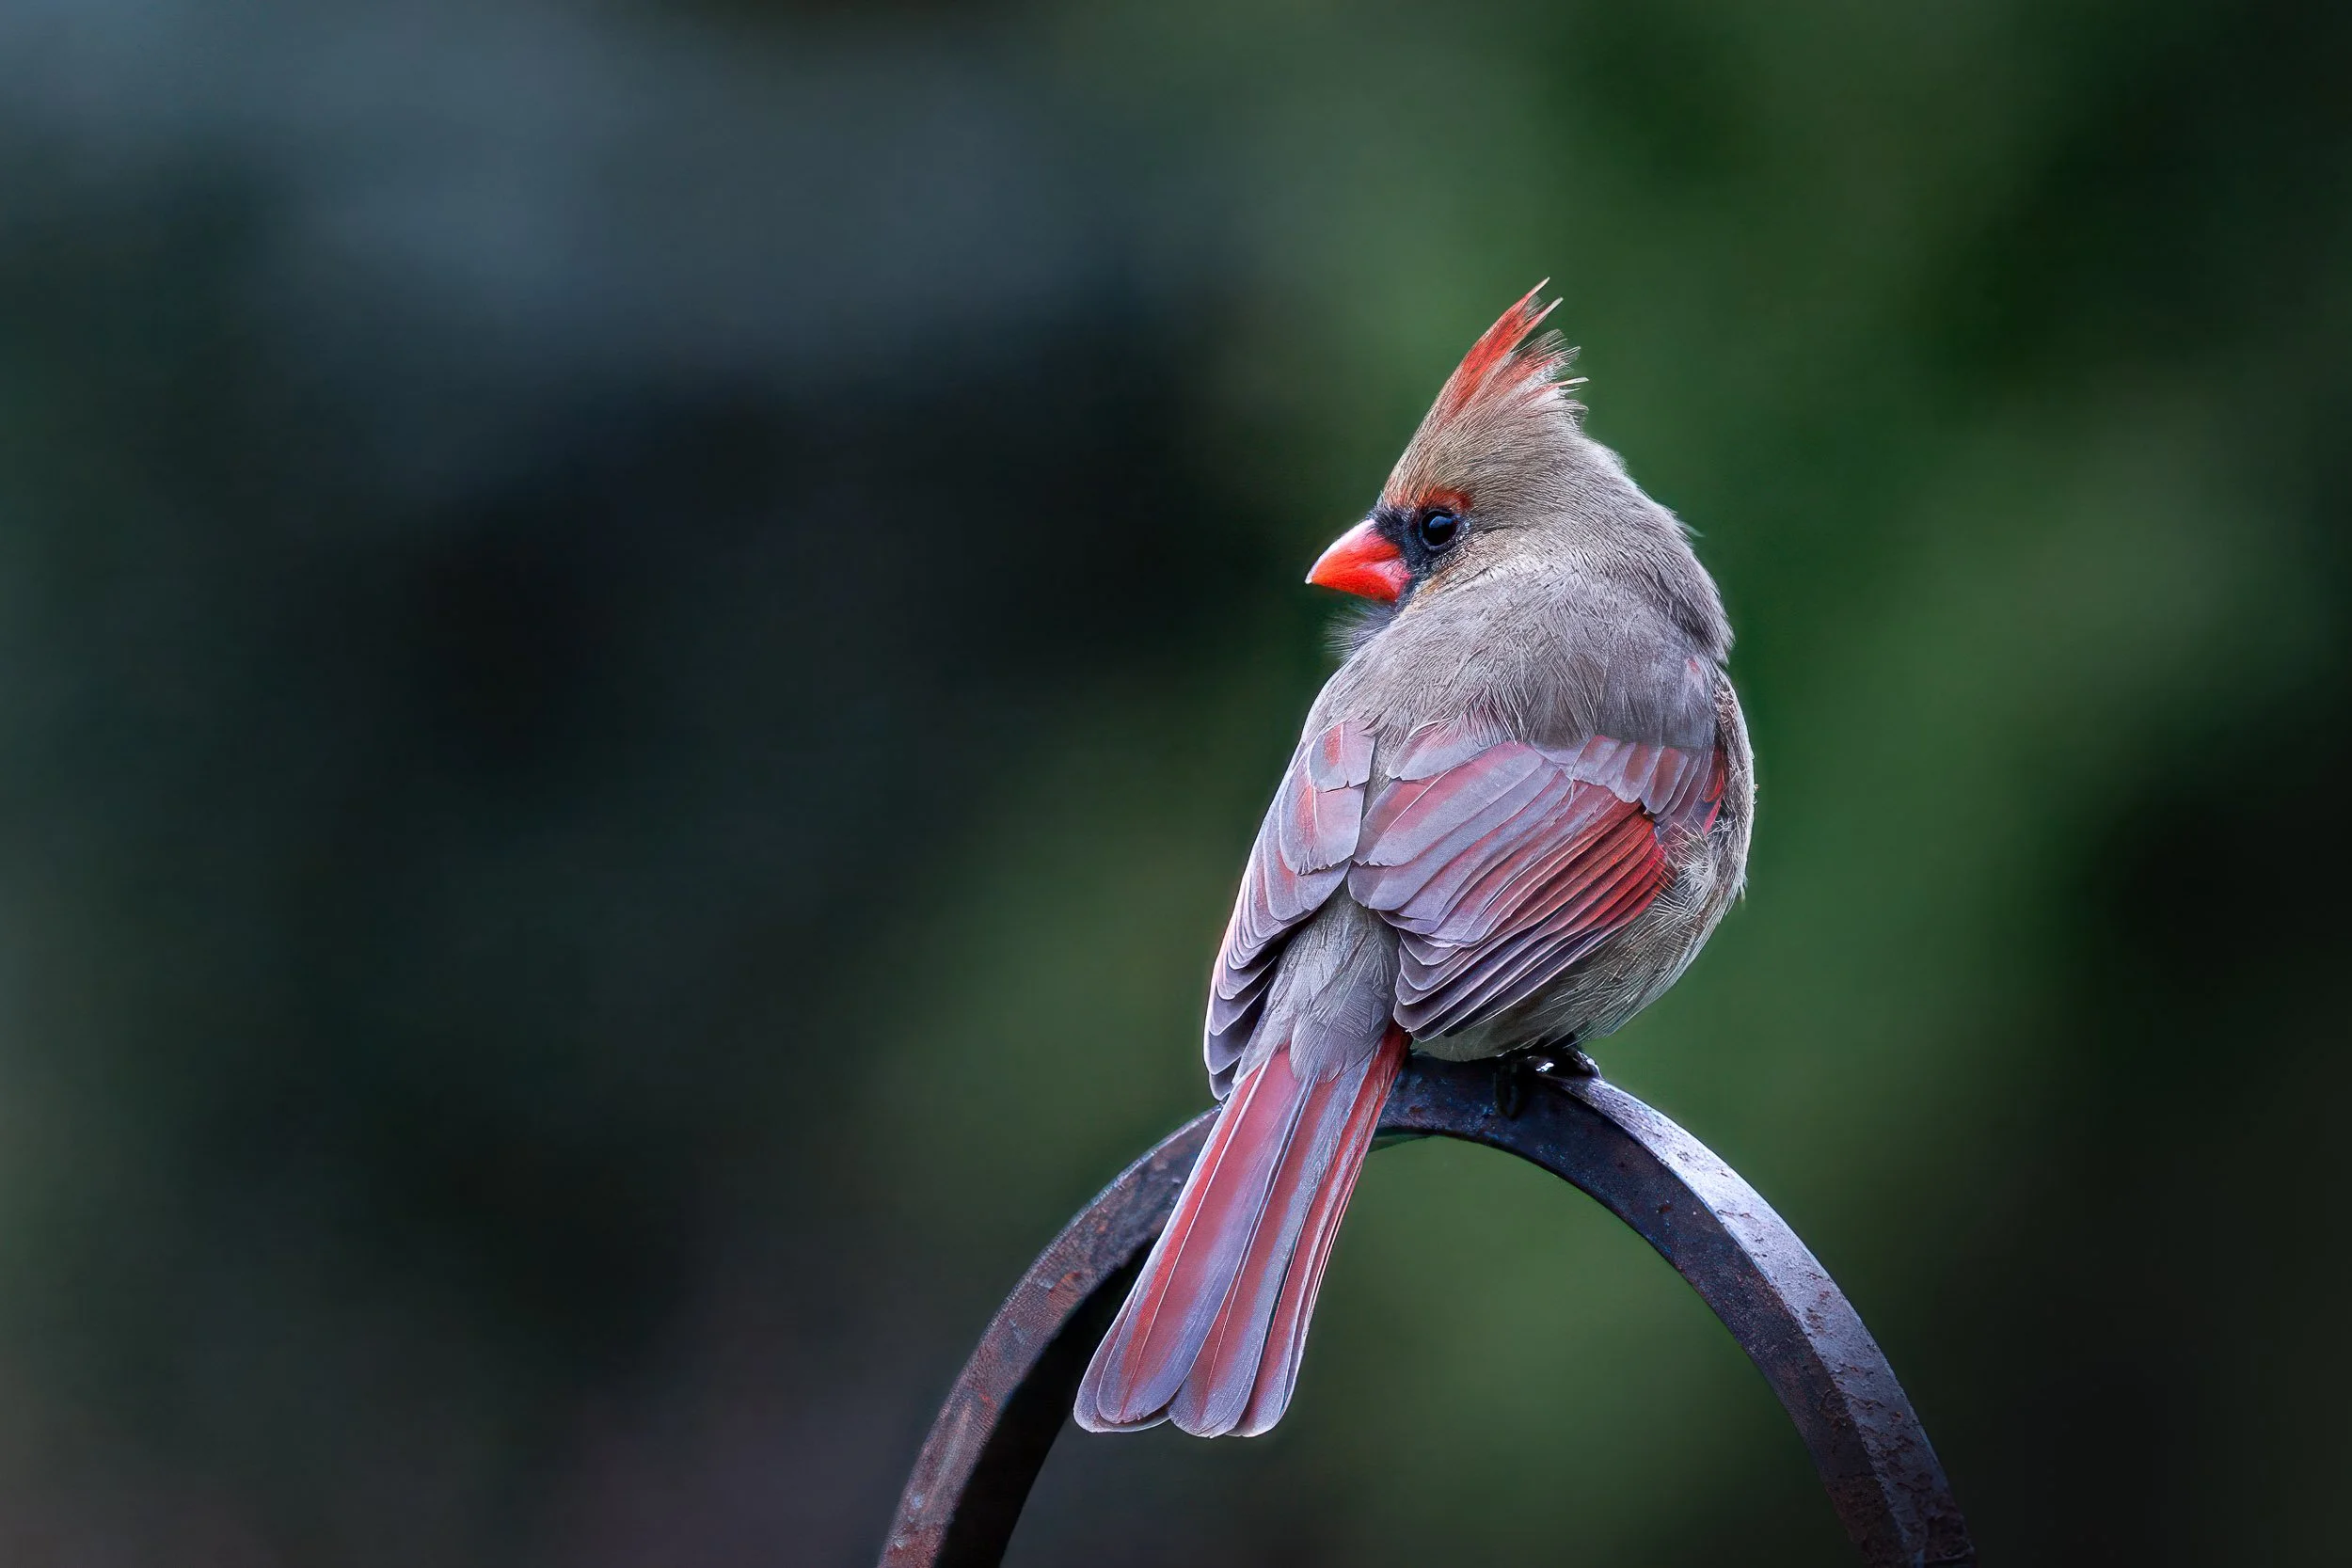
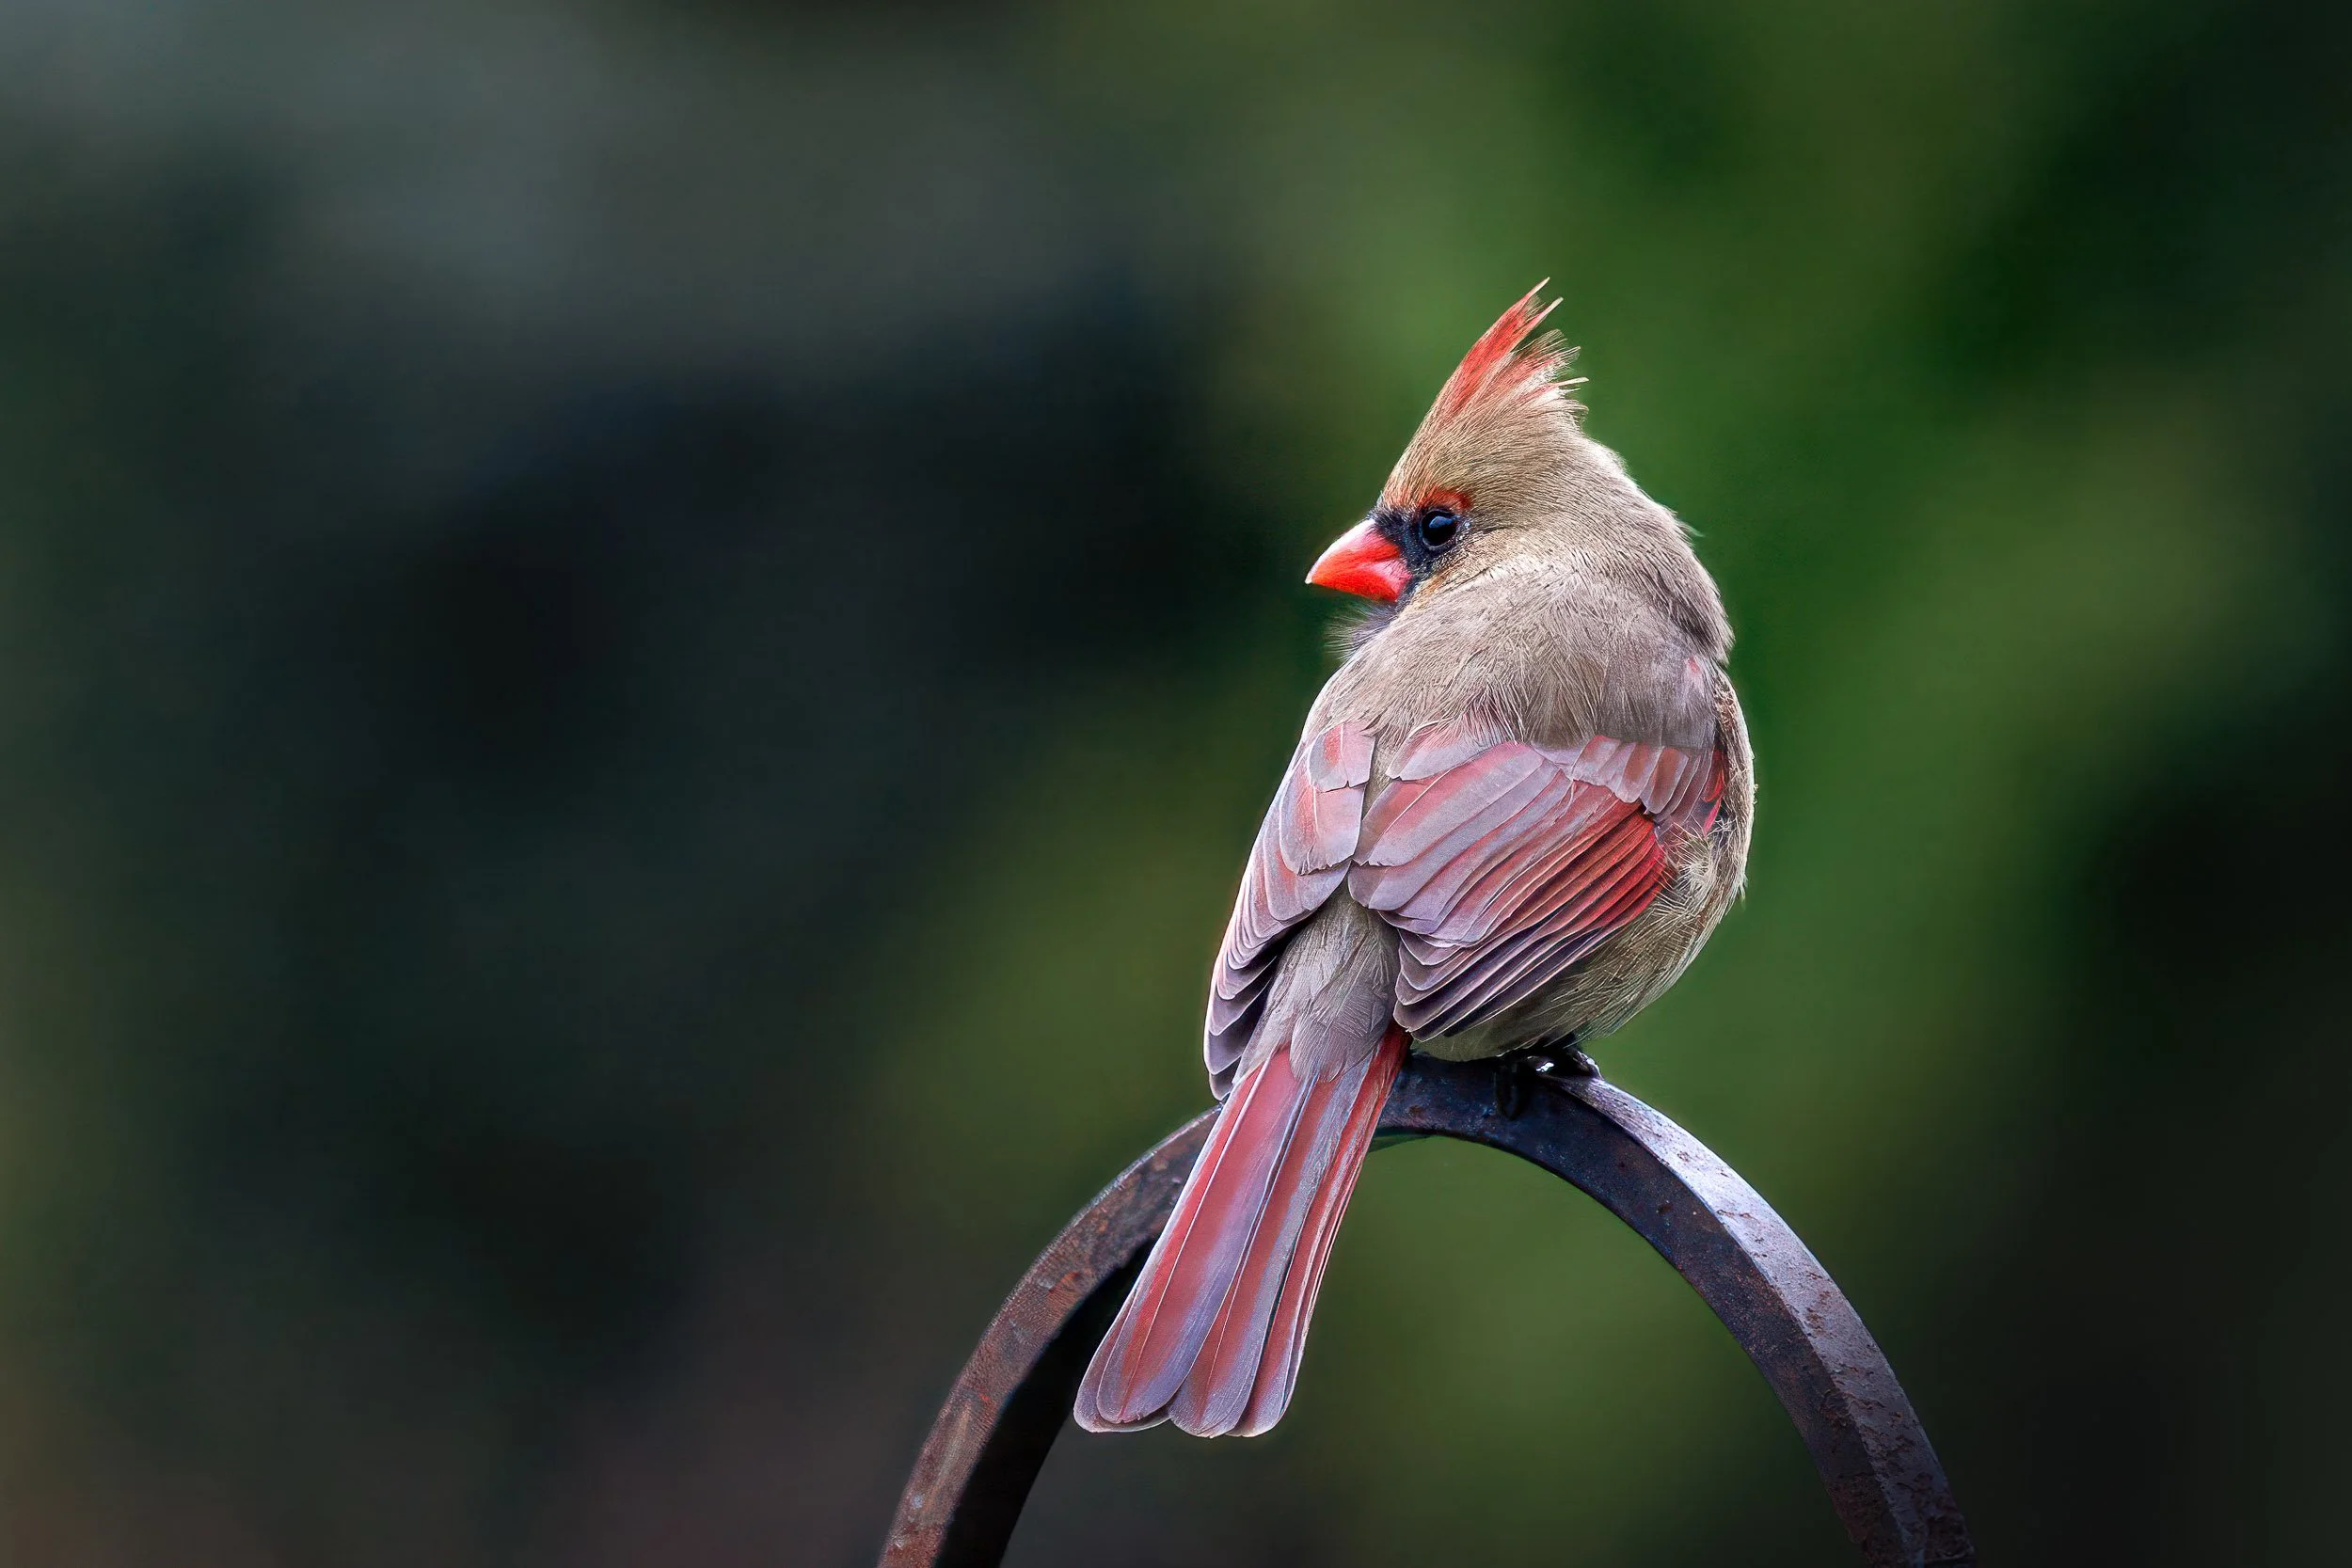
To introduce the tools, I’ve intentionally selected a simple closeup of a weathered, classic car door. This will allow us to better focus on the effect of each tool without getting lost in the details of the scene. To give you a feel for the impact of these first 3 edits (exposure, tone, and white balance) on different subjects, I’ve included before/after images of a landscape and a wildlife image at the end of this post.
The Basic panel in Lightroom Classic
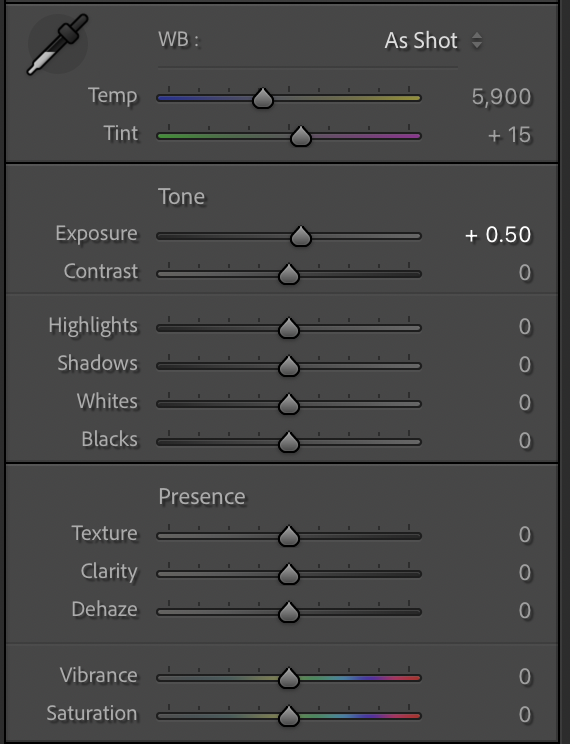
1. Exposure: Fix the Foundation
Exposure controls how bright or dark your image is and it’s usually one of the first adjustments I’ll make. Many photos are slightly underexposed or too bright straight out of the camera. A small correction here can immediately make your image feel more natural. The exposure slider can be a bit heavy-handed. It is best to start with small adjustments that can be further enhanced using the rest of the tone sliders.
Is your subject too dark? Try moving the exposure slider to the right.
Are highlights blown out (like skies or reflections)? Try moving the exposure slider to the left.
The histogram can help you dial in these adjustments and we’ll take a look at that in a later post. For now, we will just go by eye to get an overall feel for the sliders in the Lightroom basic panel.
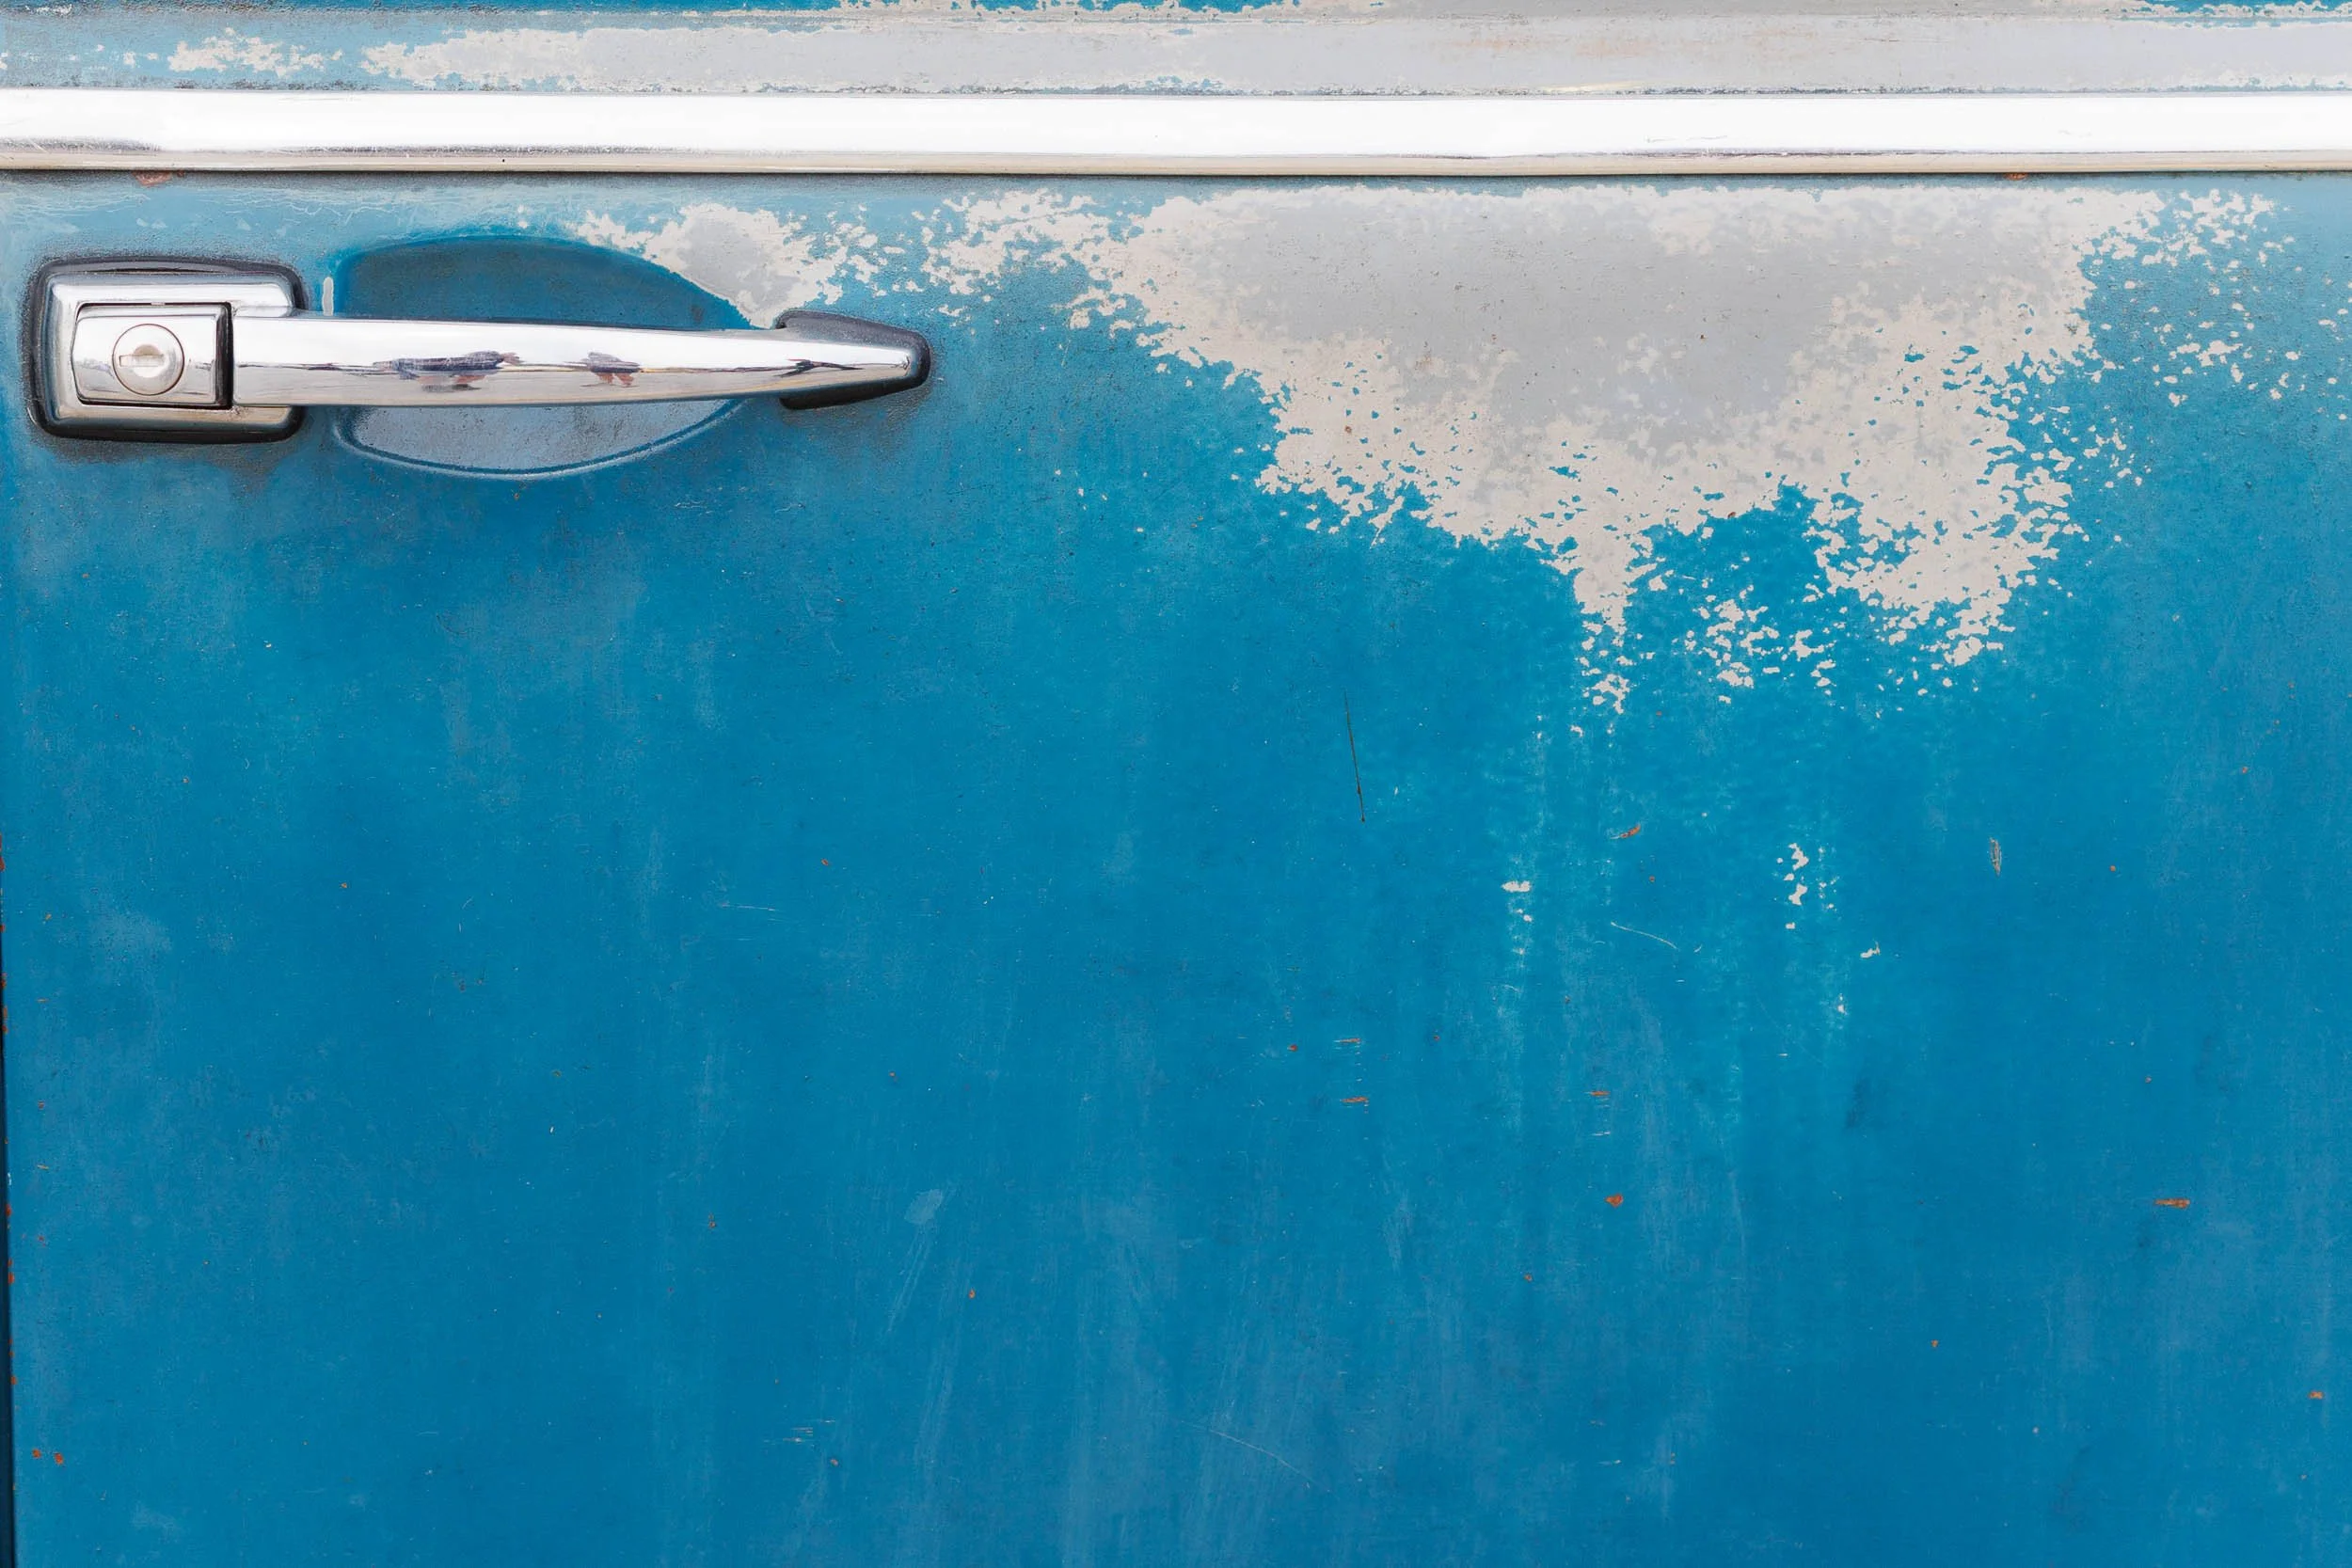
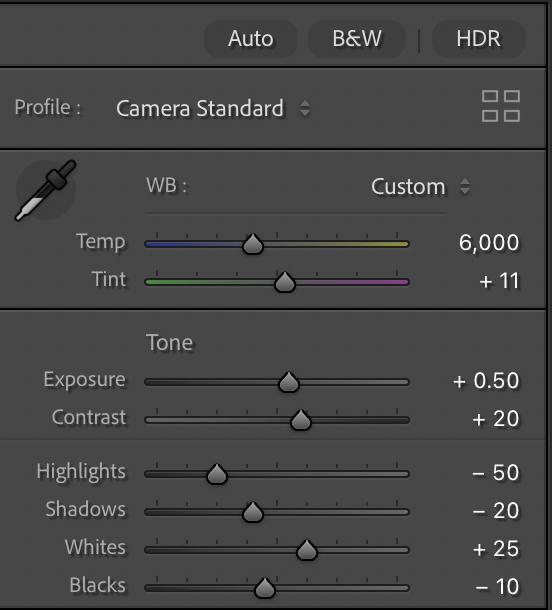
From left to right, the thumbnails below represent the original image, the Lightroom basic panel showing a change in exposure of +0.5 stop, and the resulting image with that single adjustment.
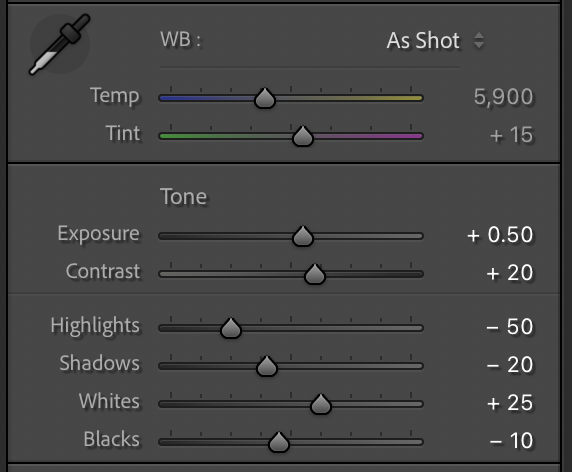
2. Tone: Add Depth and Contrast
Once exposure looks right, the next step is shaping the image with tone. This is where your photo starts to feel more dynamic.
Focus on:
Contrast – separates light and dark areas. Try moving the slider left and right to see what works best for your image. This slider, in particular, is often a matter of artistic preference.
Highlights & Shadows – recover detail. Blown out highlights can often be recovered by moving the highlights slider to the left. Similarly, areas that are too dark can be recovered by moving the shadows slider to the right. While you can often make relatively large changes here, take care to not overdo either effect.
Whites & Blacks – fine tune the overall range. The whites and blacks sliders provide another way to adjust the overall exposure of the image and often allow for more subtle adjustments than the exposure slider itself. Experiment with these sliders until the scene fits your vision.
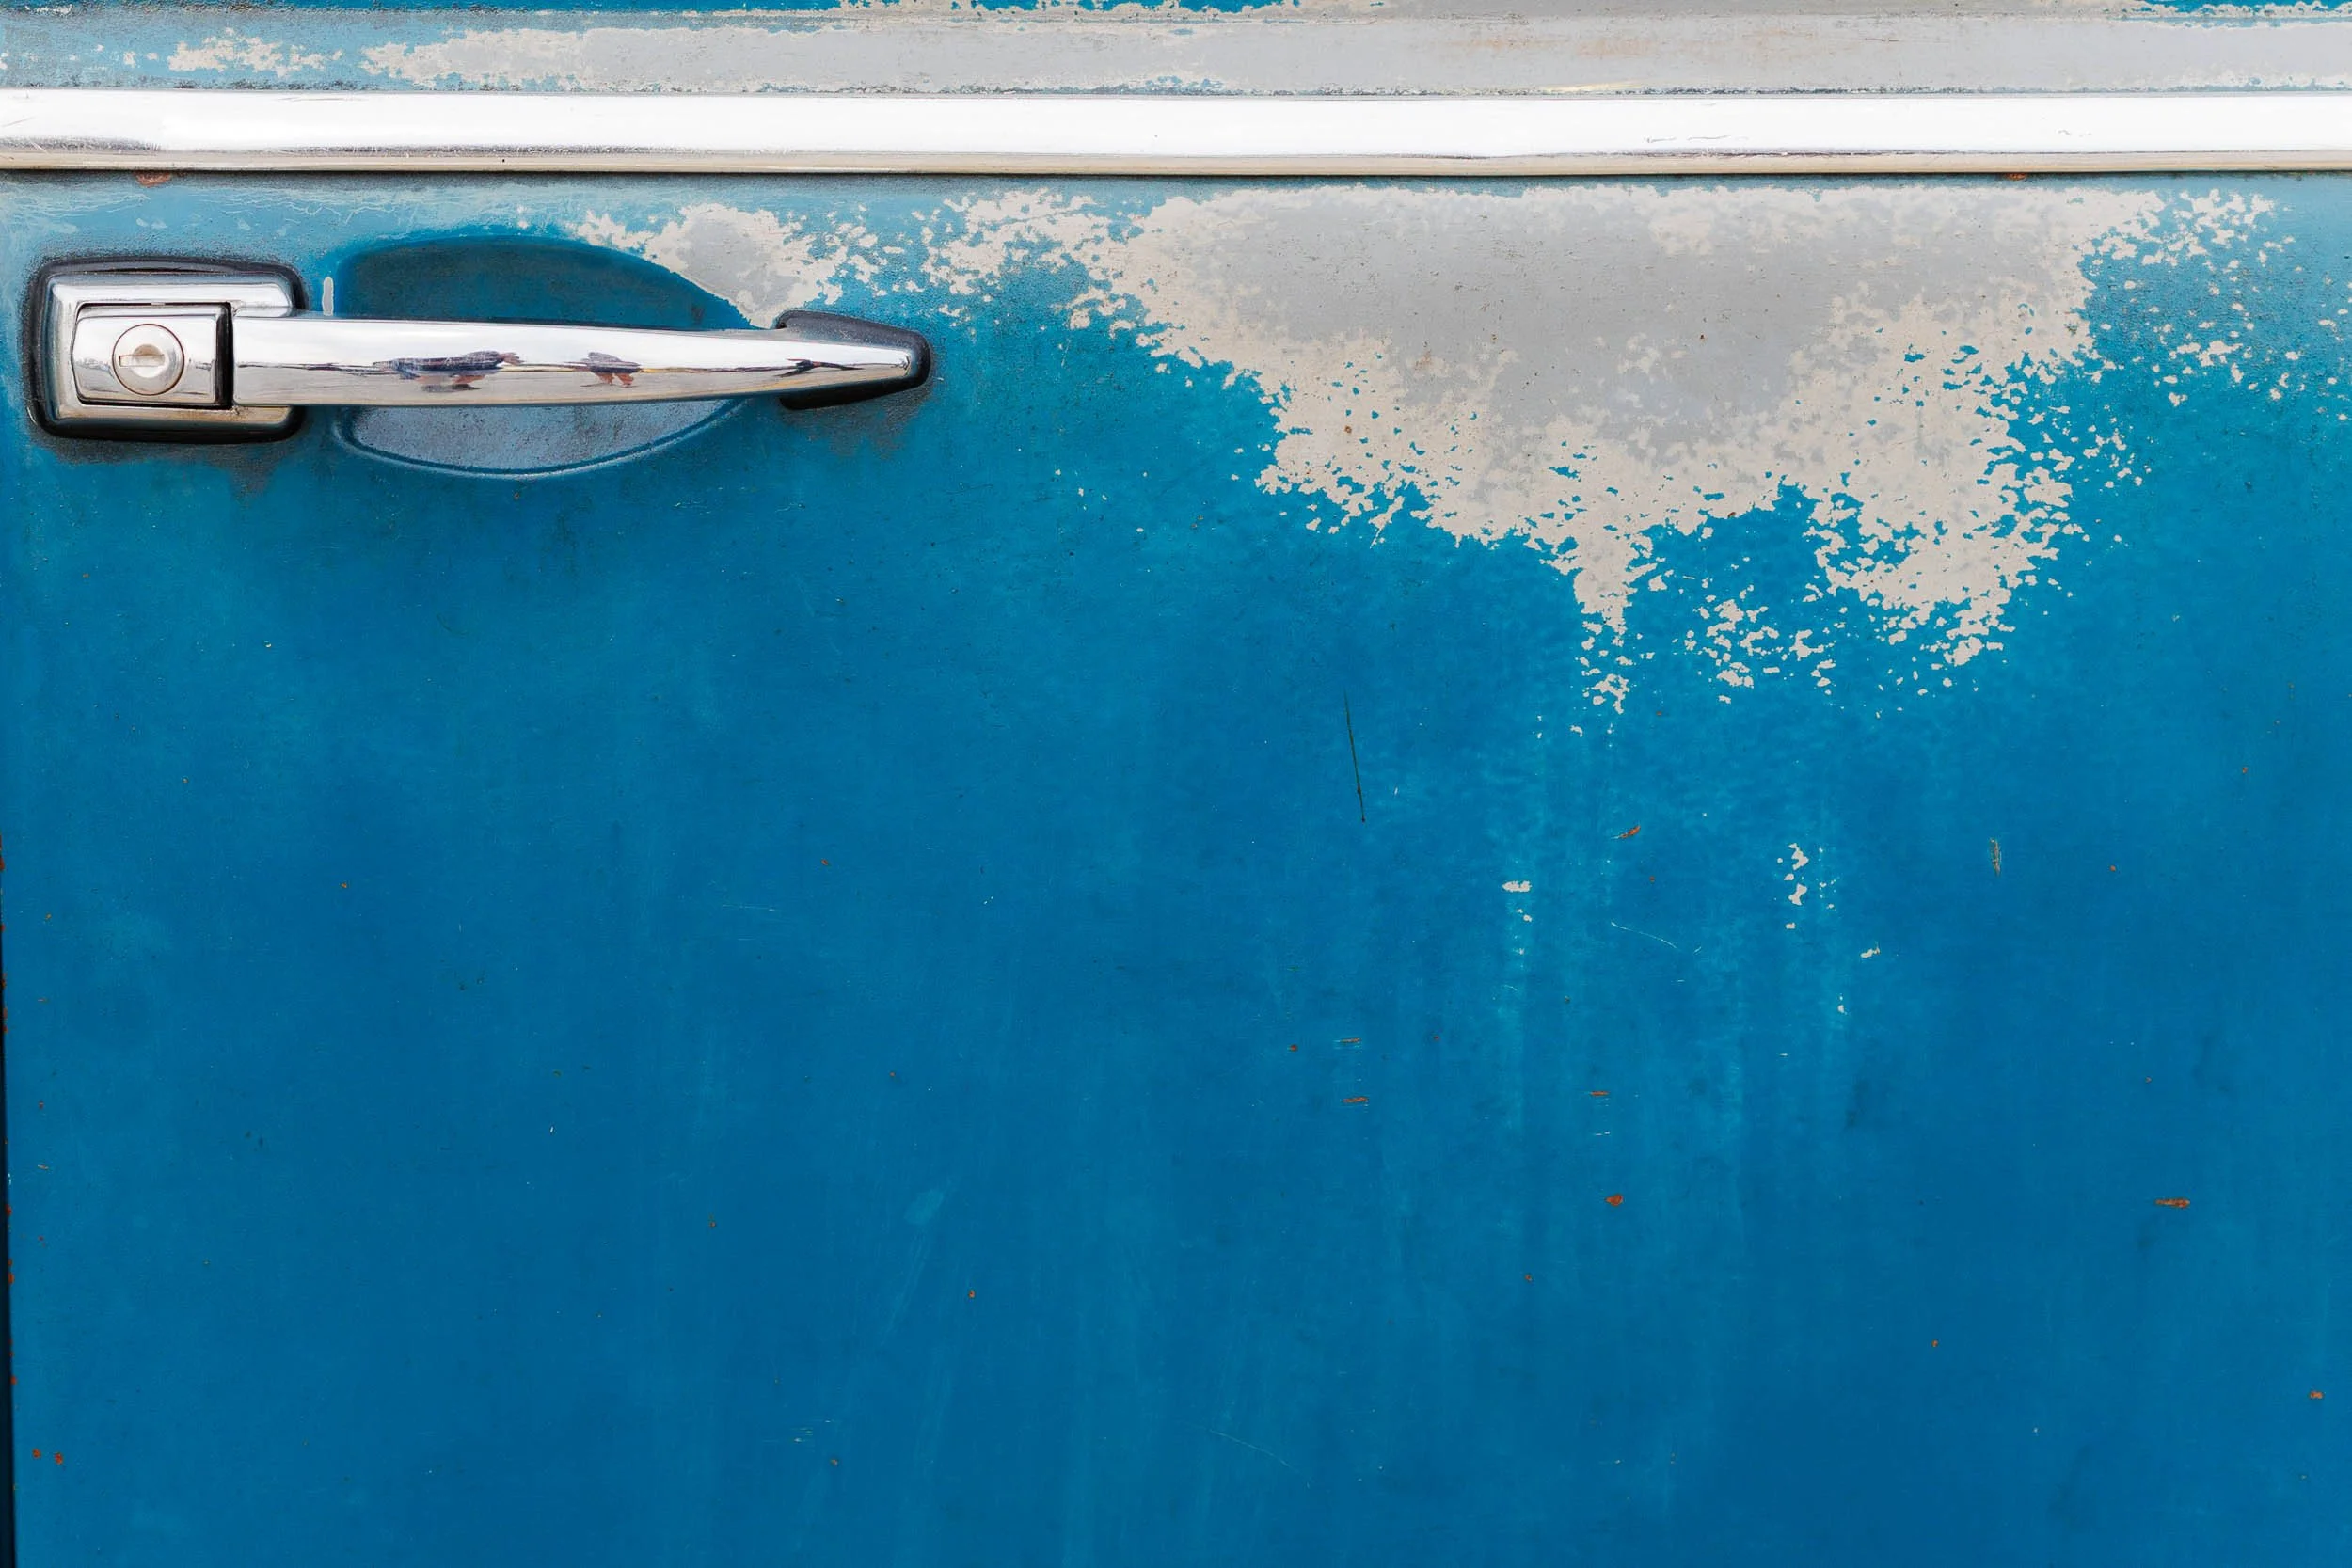
A flat image can come to life with just a few subtle tonal adjustments. From left to right, the thumbnails below represent the original image, the Lightroom basic panel indicating the changes to made to each slider, and the image with the additional tonal adjustments.
Pro tip: hold the Option key (Mac) or Alt key (Windows) while dragging the whites or blacks slider to see exactly where you will start to lose detail in those areas (pixel clipping).

3. White Balance: Match the Scene
White Balance helps you match your image to what you saw, or even what you felt, in the moment. Natural color here tends to look more professional than heavy-handed edits and white balance adjustments are often subtle.
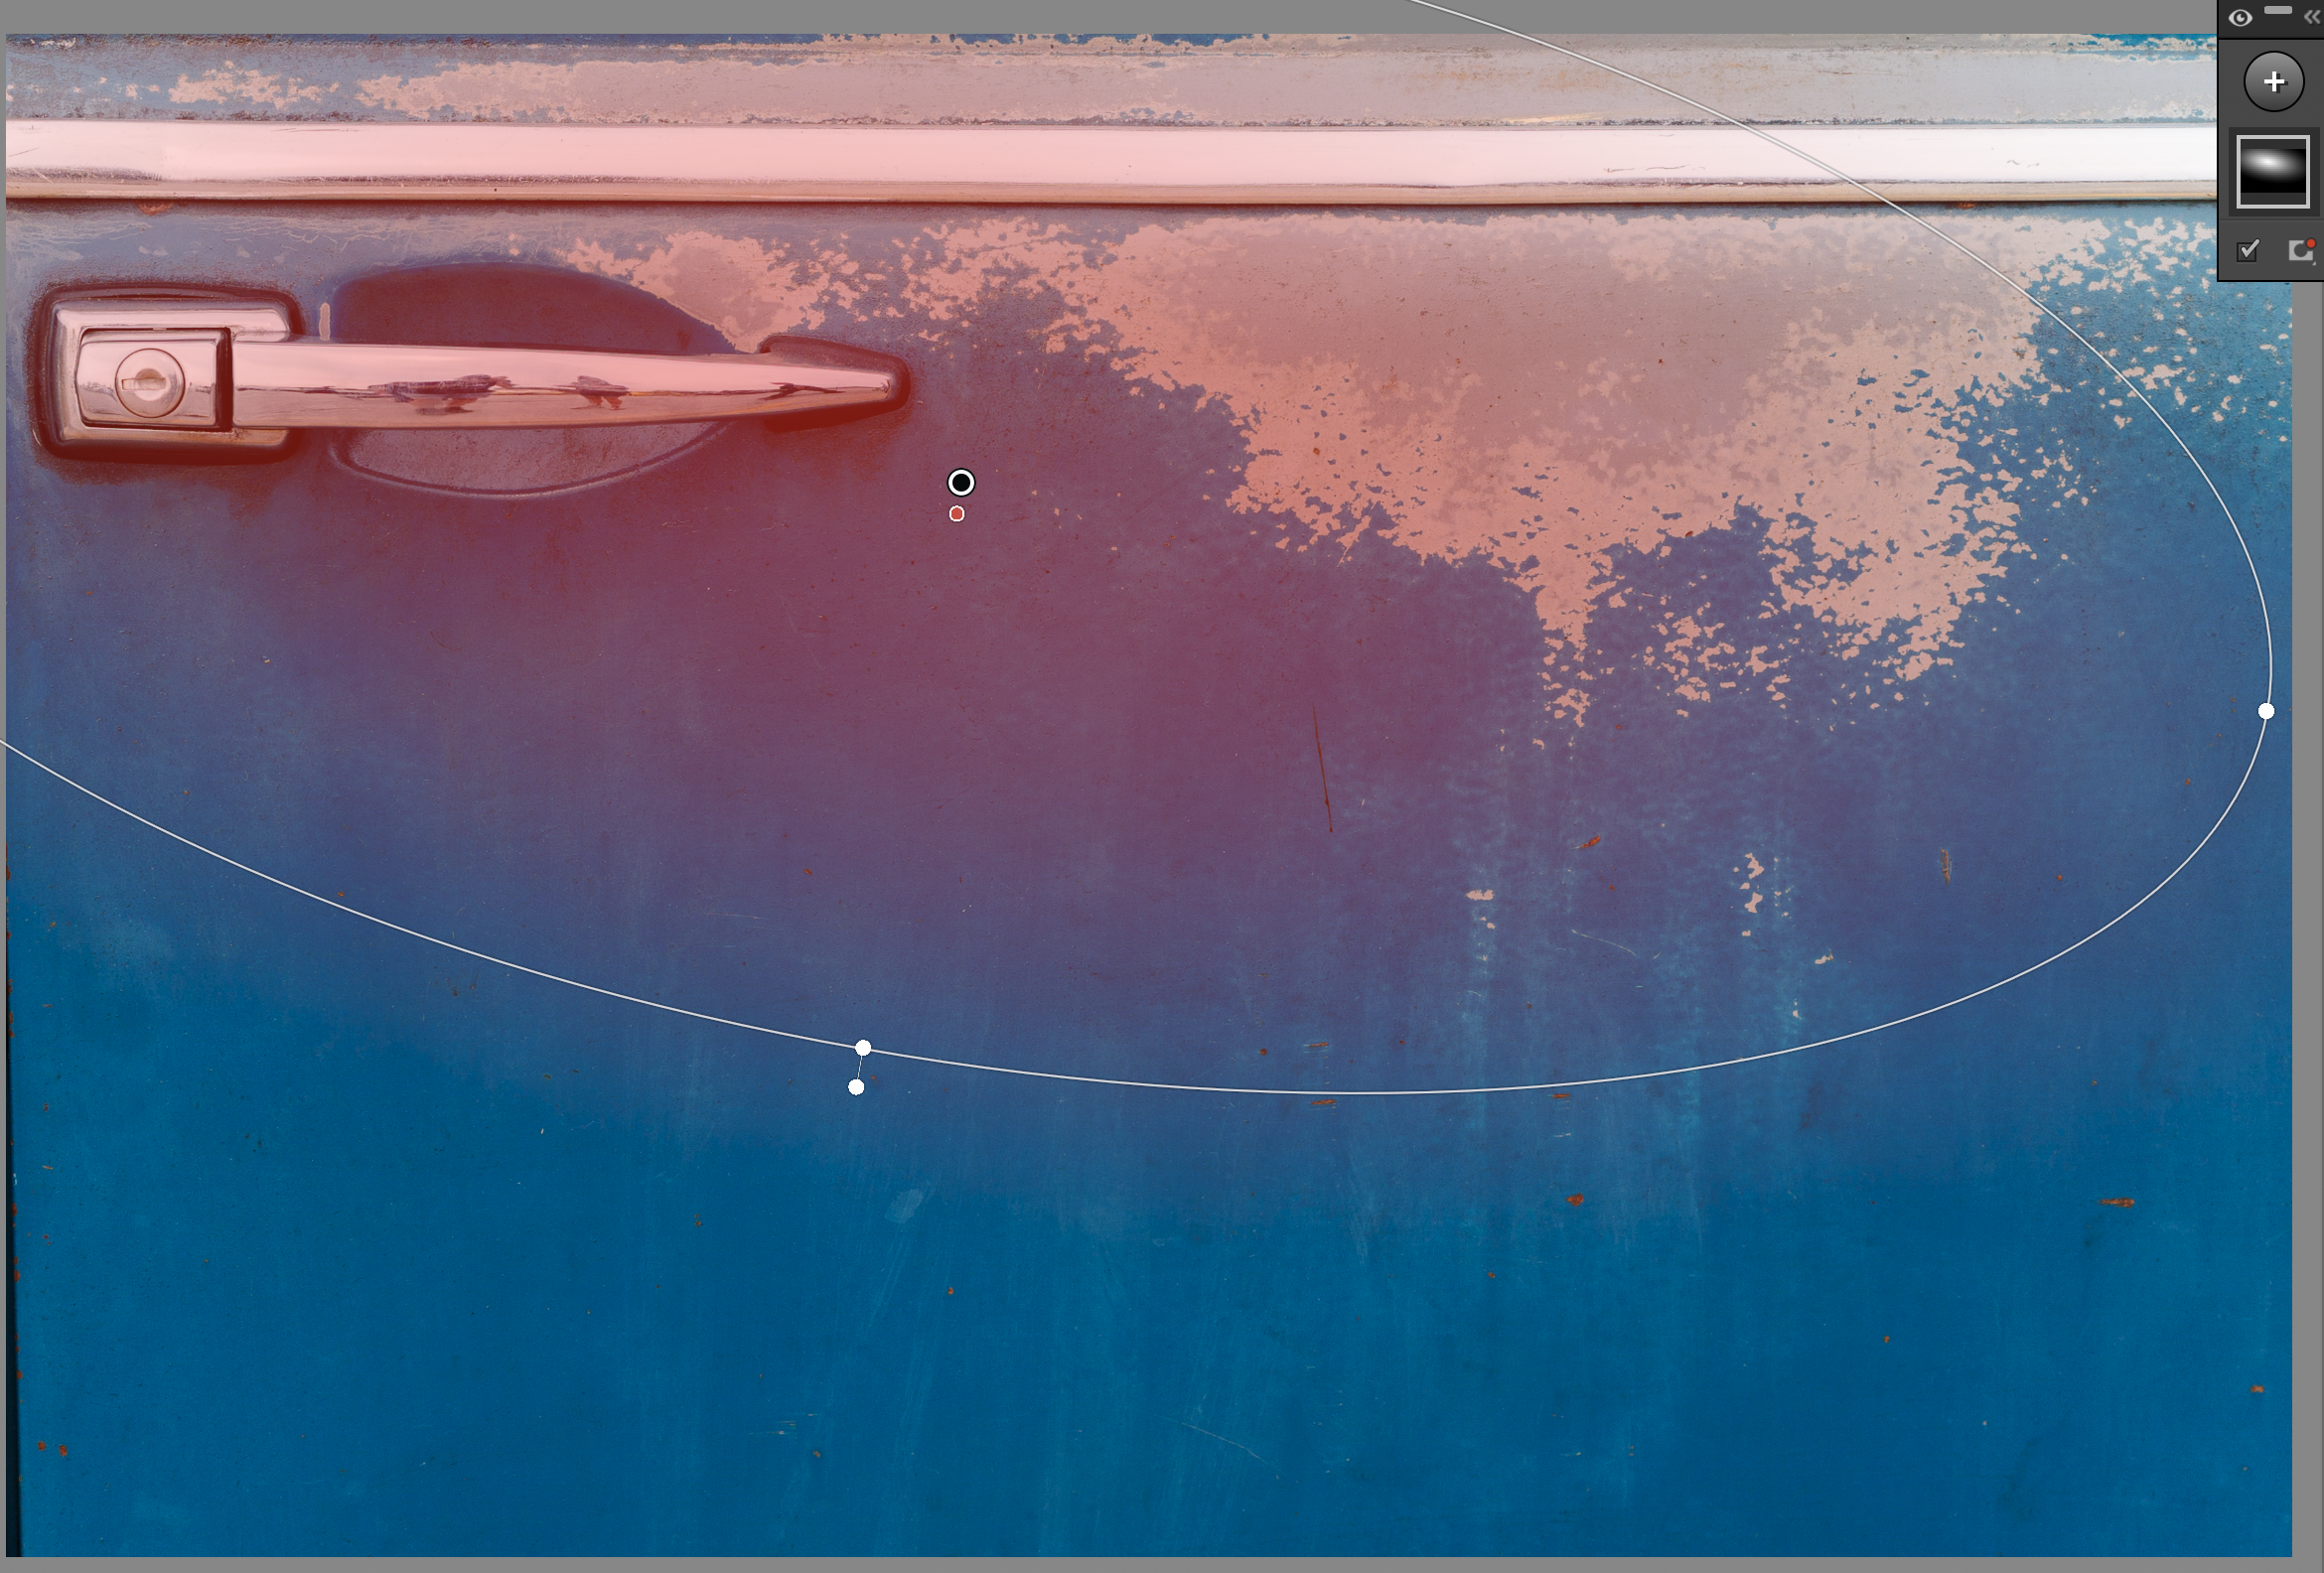
Don’t know where to begin? The eyedropper tool in the Basic panel can be used to provide a starting point. Click on the eyedropper and then click on a neutral area (white, gray, black) of the image and Lightroom will adjust the color automatically. You may need to test different neutral areas to find a white balance that you like.
From left to right, the thumbnails below represent the original image, the Lightroom basic panel showing a very slight change in white balance (a bit more blue and a bit less magenta), and the resulting image with adjustments to exposure, tone, and white balance.

A Preview of Masking
The adjustments above are global edits that affect your entire image. But what if you only want to edit part of it? That’s where masking comes in.
Masking in Adobe Lightroom lets you:
Brighten a subject without affecting the background
Darken a sky for more drama
Add detail exactly where it matters
Shape the light
Masks are one of Lightroom’s most powerful features and we’ll dive deeper into masking in a future post. For now, just know it’s the next step once you’re comfortable with the basics.
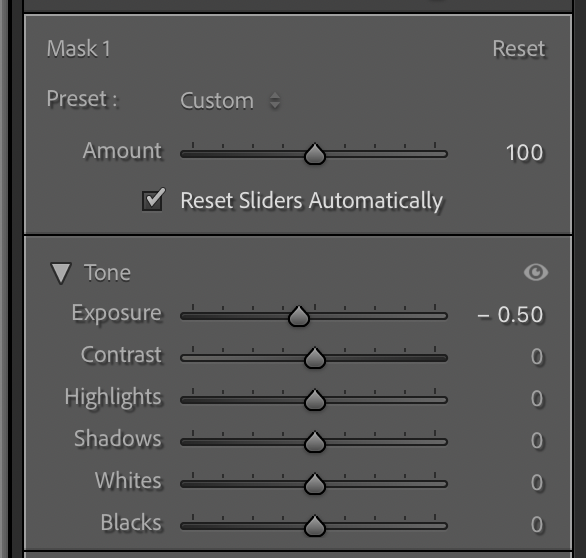
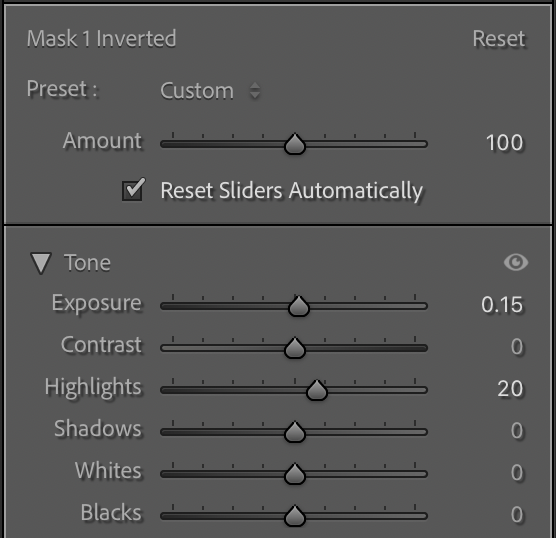
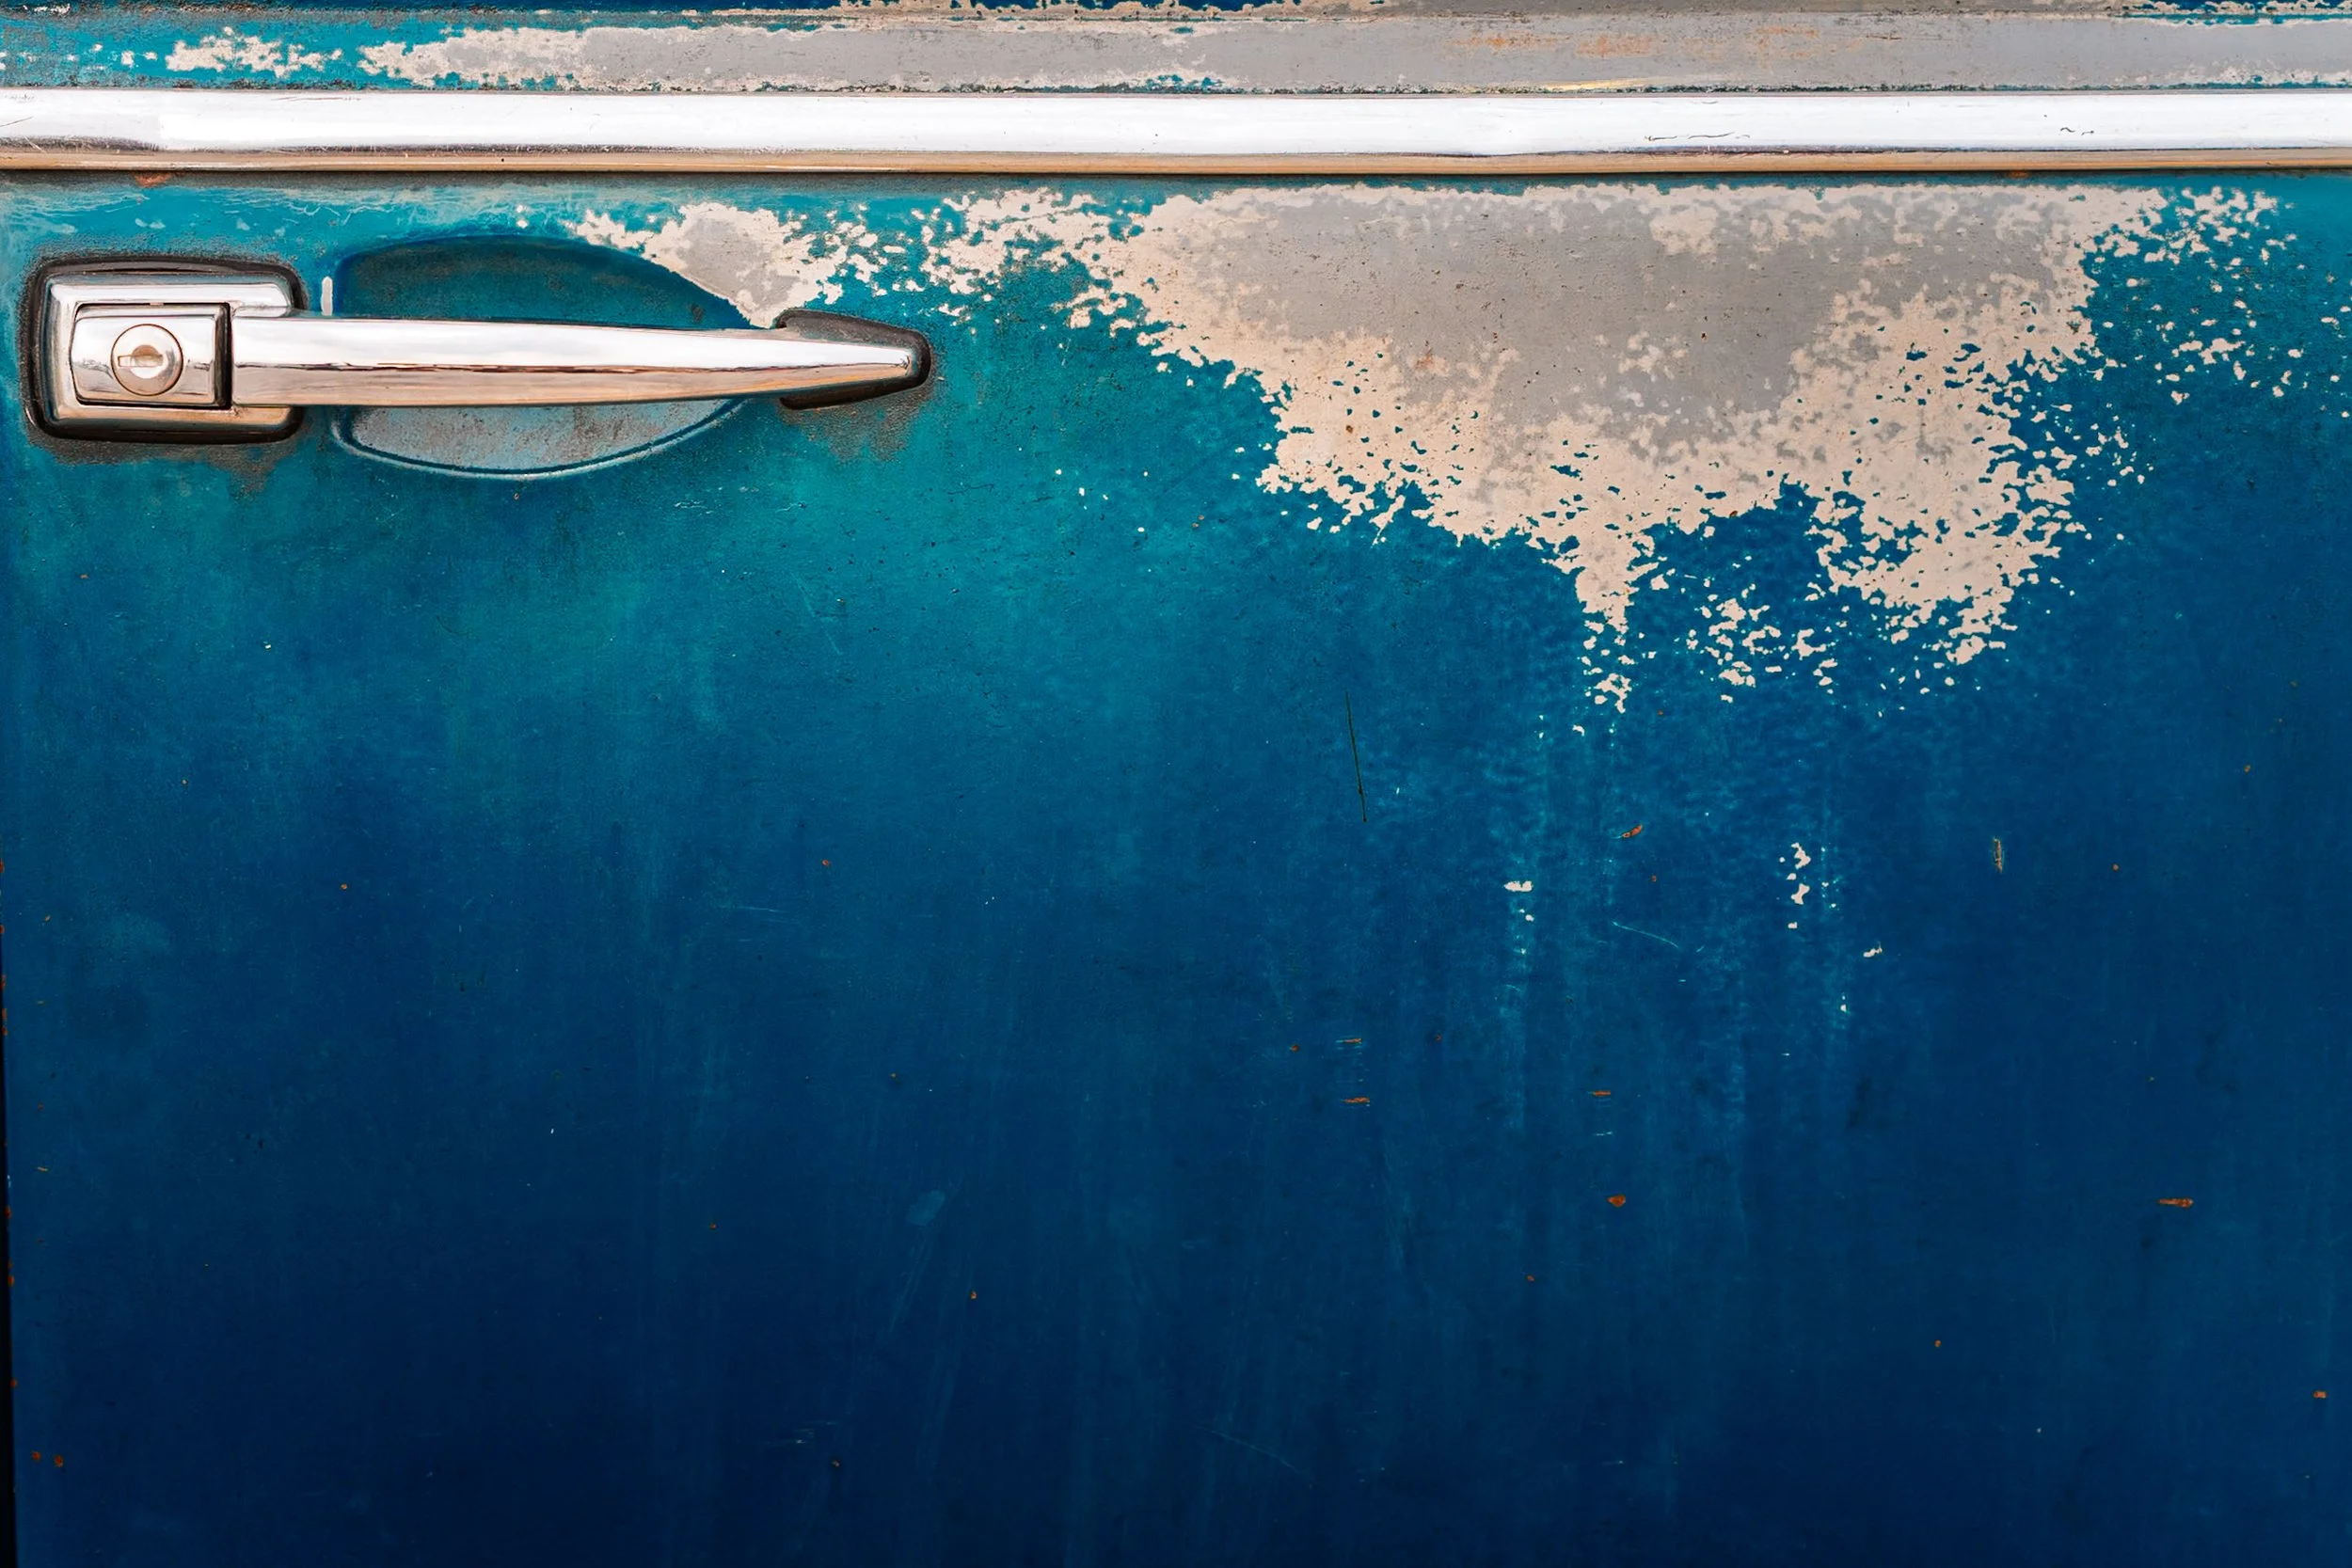
Here is a simple example of shaping the light. I’ve added two identical radial gradients to simulate light coming from the top left of the image - one slightly darkens the area outside of the mask and the other adds a touch of extra light to the masked area. From left to right below, the sliders show the area being masked in red, the adjustments for the masks, and the image with those adjustments.
Putting It All Together
A simple editing flow you can follow every time:
Adjust Exposure
Refine Tone
Correct White Balance
(Optional) Apply Masking
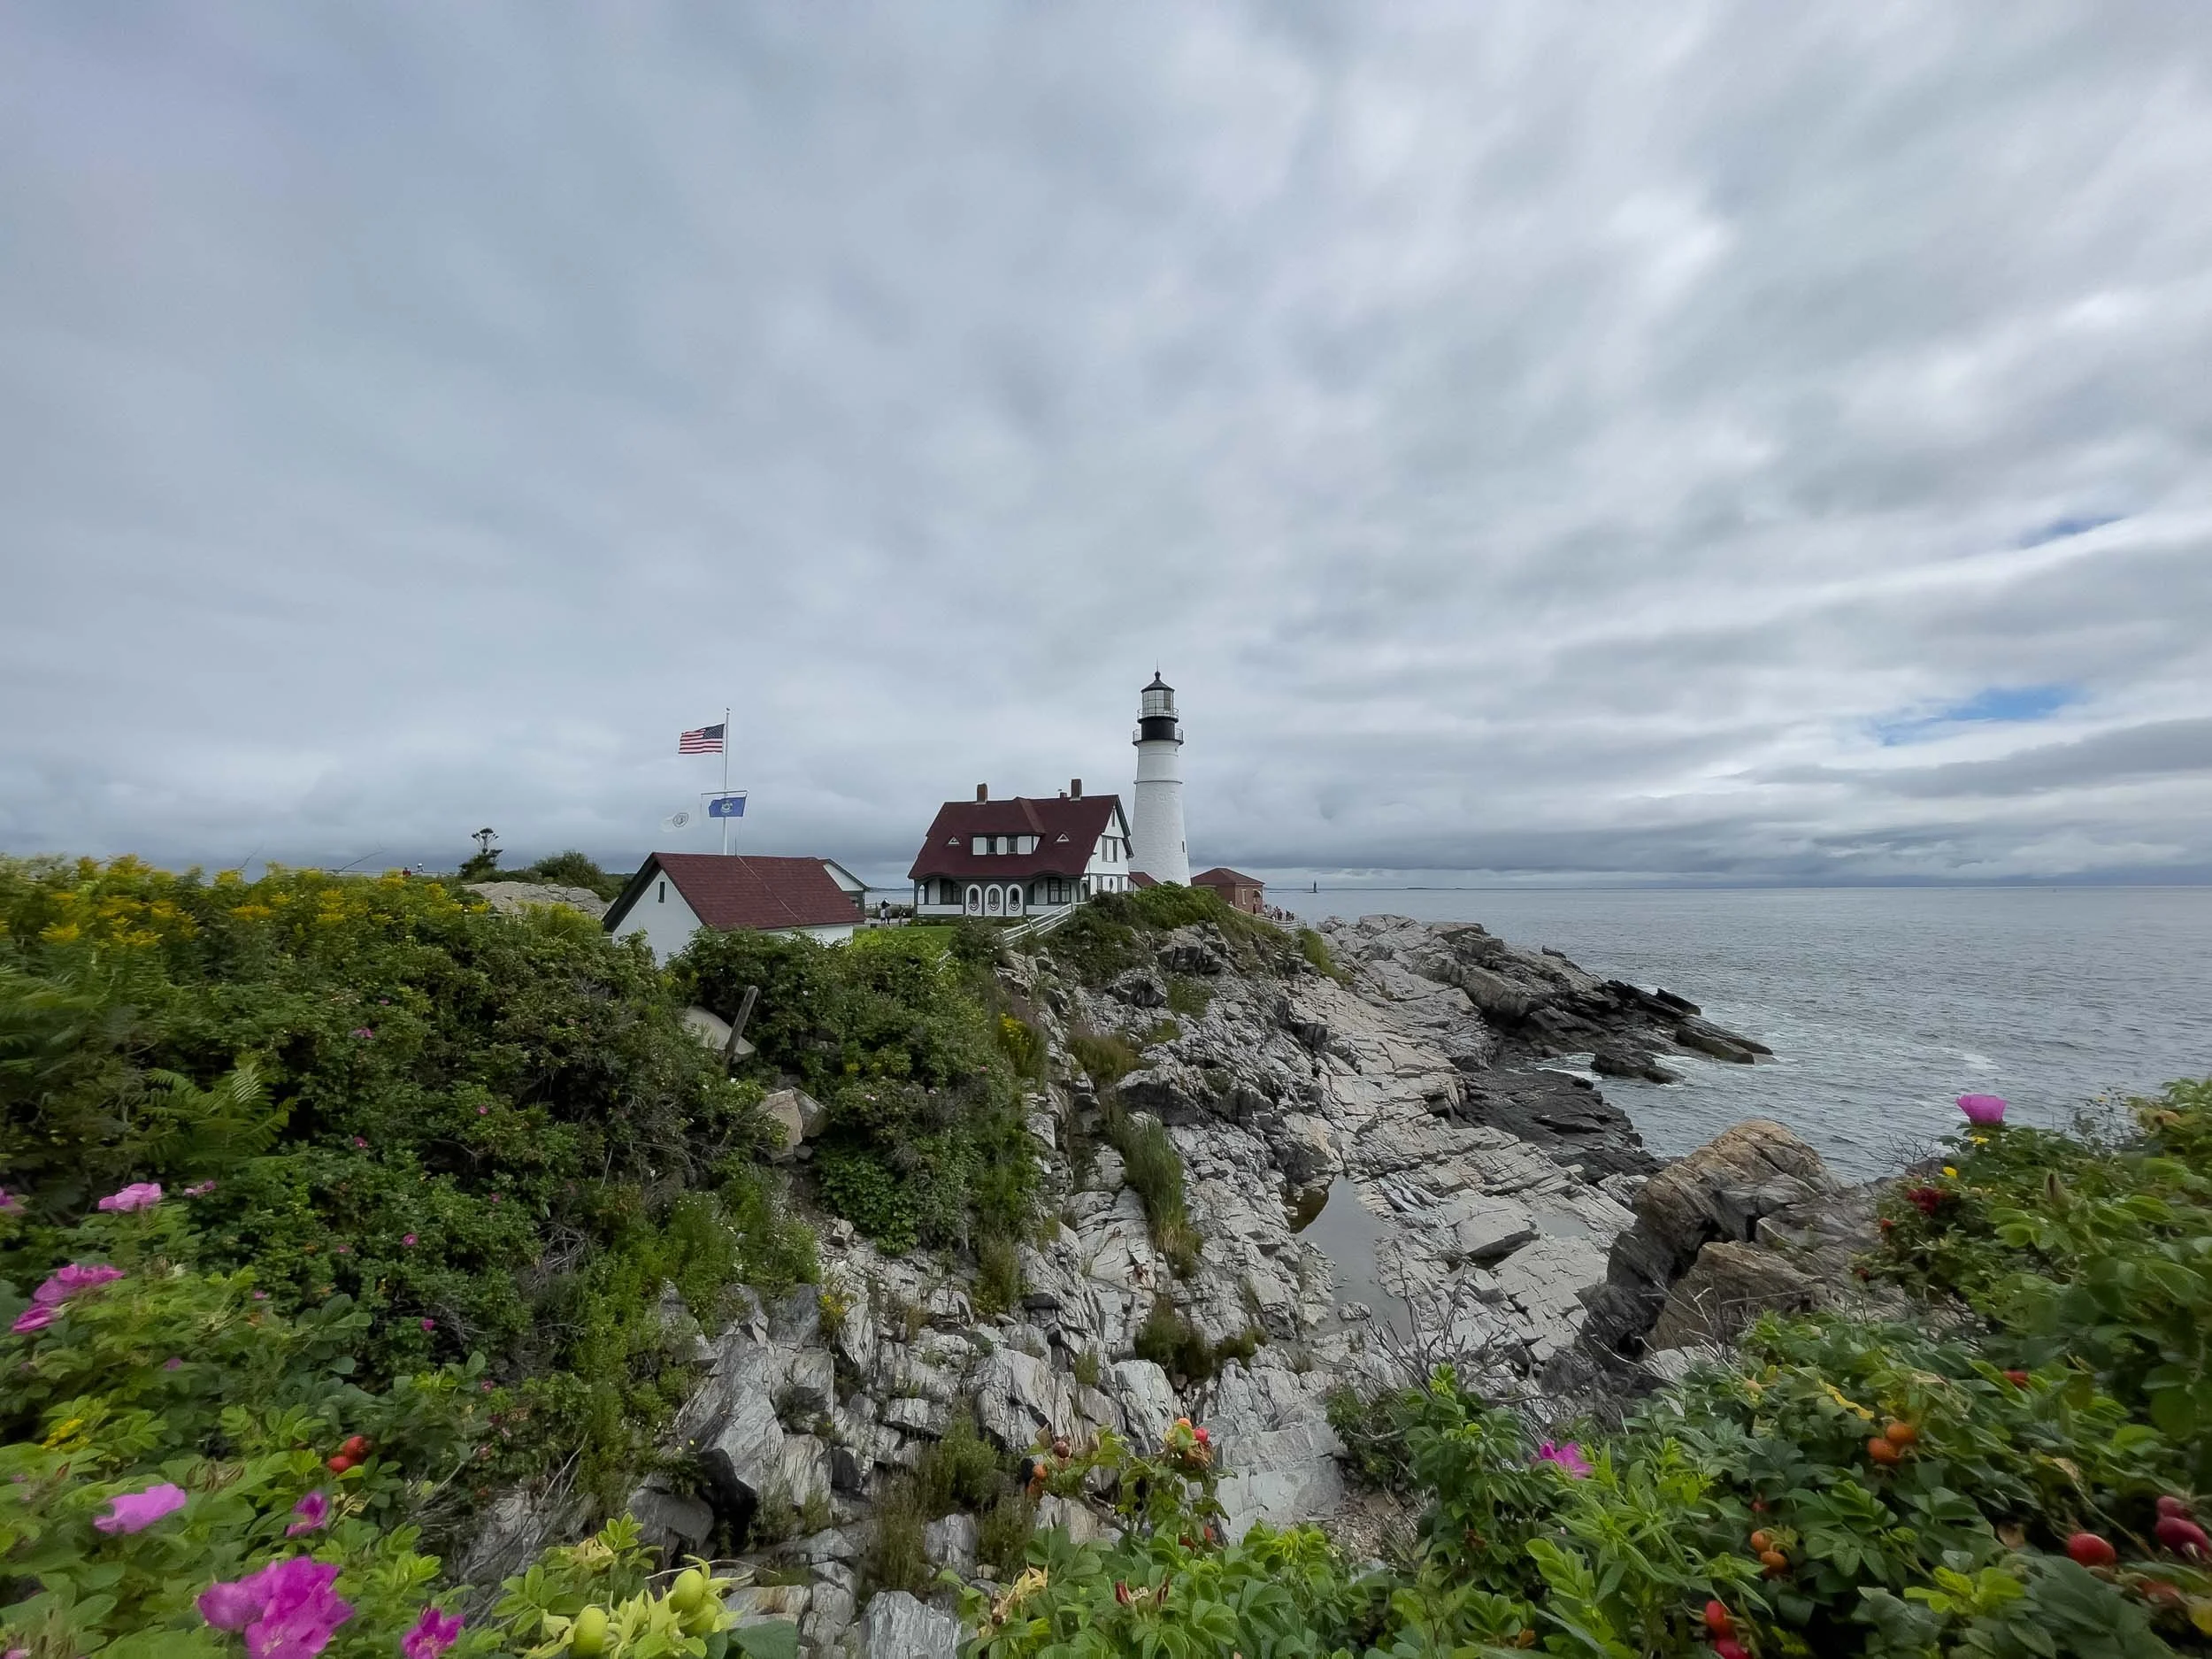
Before
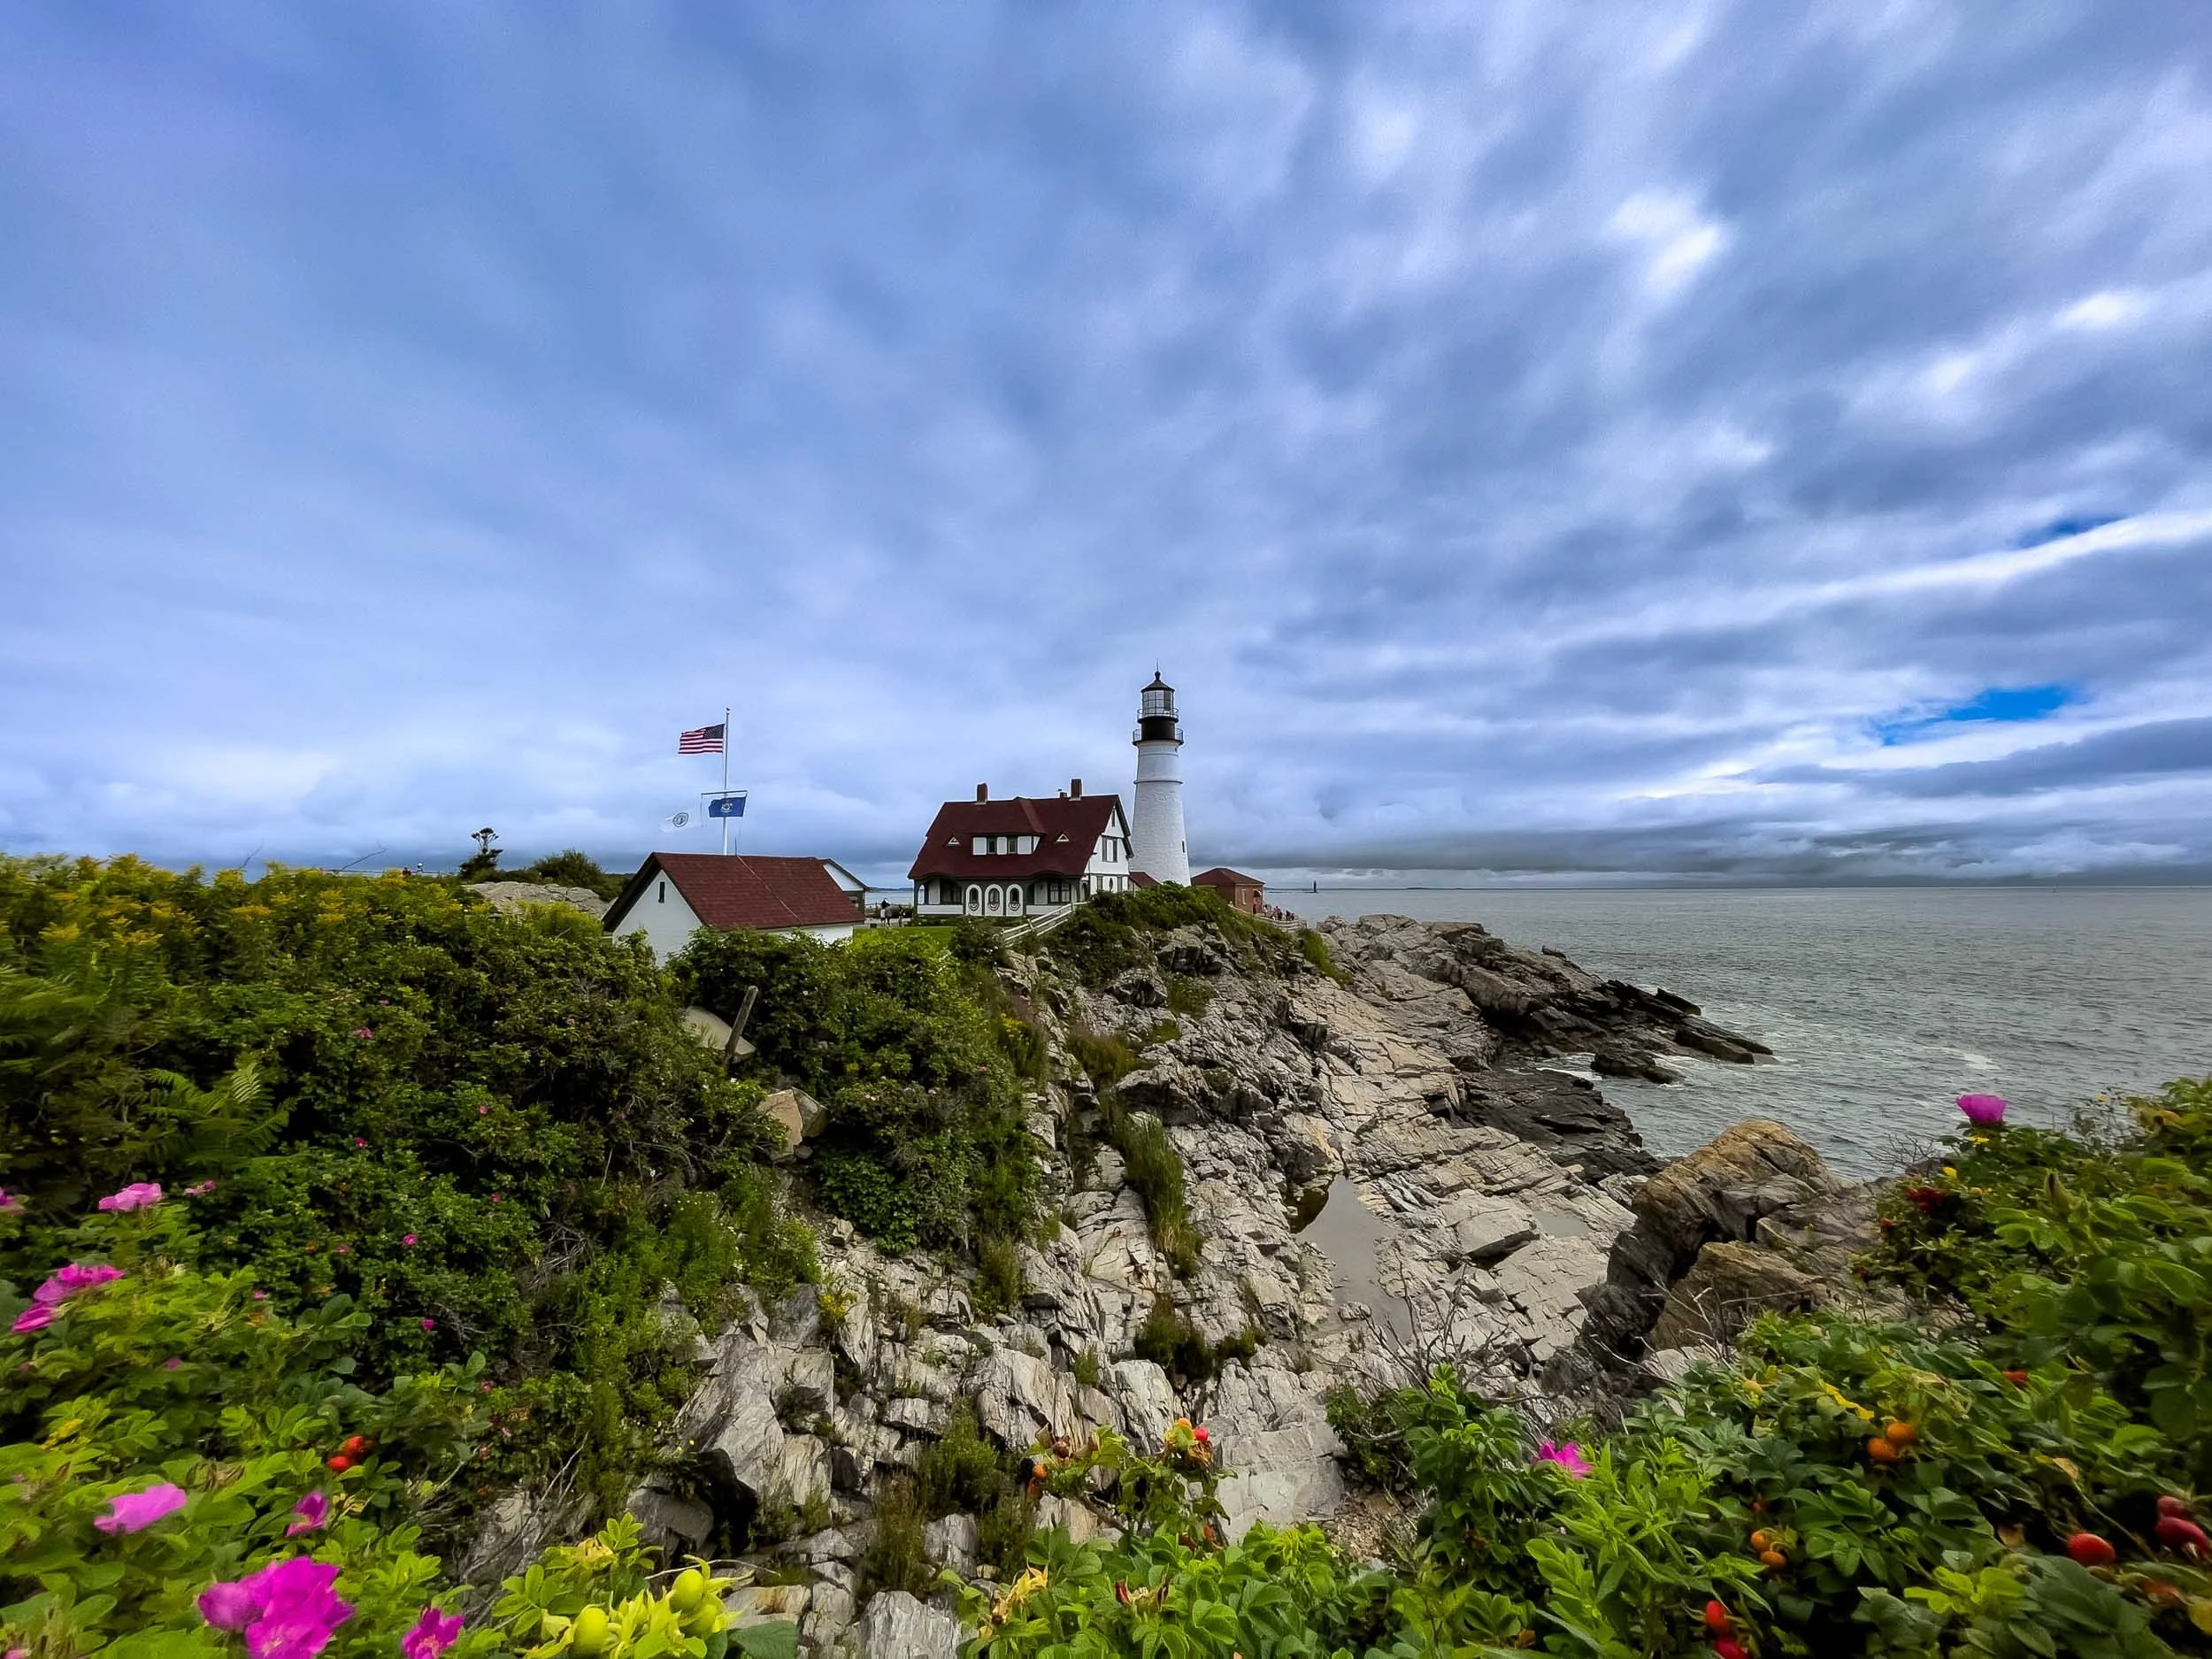
After
Start simple. Practice often. Focus on small improvements that bring your photos closer to what you envisioned when you pressed the shutter.
Pro tip: After making your edits, walk away from the image for a bit. Take another close look when you return to make sure the edits match your vision. It is easy to get lost in the process and giving your eyes a short break often results in you making a few final tweaks that improve your edit.
Stay tuned for the next post in the series!